How to Season Firewood for Hot, Clean Burns
You did everything right. You bought the firewood, stacked it neatly against the garage, and lit the match on a cold night — and got a smoky, hissing, sputtering mess that barely warmed the room. By morning, the glass on the stove was black and the whole house smelled like a campfire gone wrong. I have been exactly there, staring at a pile of expensive wood that refused to burn, wondering what I did wrong.
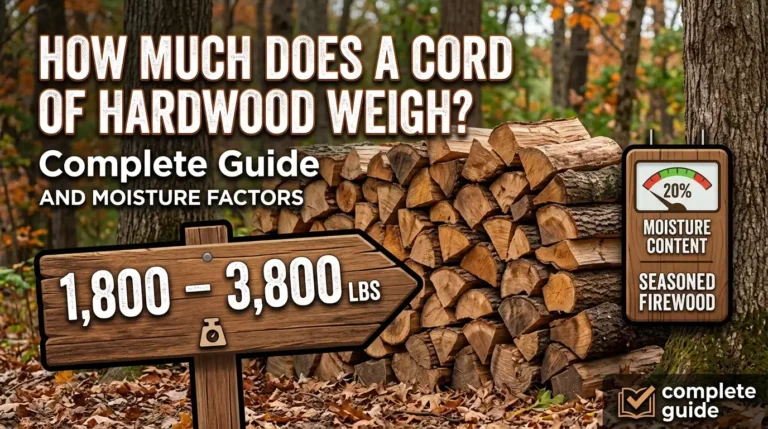
What I did wrong was burn it too soon. Fresh-cut wood is soaked — often 35 to 60 percent water by weight — and all that water has to boil off before the wood can give you heat. Learning how to season firewood is really learning how to get that water out: cut it, split it, stack it for air, and wait. By the end of this guide, your wood will be down near 20% moisture, lighting fast, burning hot, and leaving your chimney far safer. The hands-on work takes one afternoon. The waiting takes months, so plan ahead — 6 months minimum, and a full year or more for dense hardwoods.
Safety note: this guide covers drying wood, not burning it. When burn season comes, use only a properly vented fireplace or stove, keep a working carbon monoxide detector in the room, and have your chimney inspected and swept every year. Wet wood builds creosote fast, and creosote causes chimney fires.
- Chainsaw or hand saw
- Splitting axe or maul
- Pin-type moisture meter
- Tape measure
- Wooden pallets or rails
- Tarp, plywood, or metal roofing
- Work gloves
- Eye protection
- Cut logs to fit your firebox
- Split each piece 6 inches or thinner
- Pick a sunny spot with moving air
- Lift the stack off the ground
- Stack in single rows, ends facing the breeze
- Cover the top — and only the top
- Test with a moisture meter until it reads 20% or less
- Confirm the wood is ready before you burn it
Cut Logs to Fit Your Firebox
16 inches is the length that fits most wood stoves and fireplaces, but do not guess — measure your firebox depth and subtract 2 to 3 inches so logs load without touching the glass or door. Cut everything to the same length now; uniform pieces stack tighter, dry more evenly, and handle better all winter.
Cut your wood before you split it. Rounds are easier to measure and saw accurately than a pile of splits, and every cut end you expose starts drying immediately.
Split Each Piece 6 Inches or Thinner
Splitting is the single biggest speed lever you have. Bark seals moisture in; a split face lets it out. Forestry trials have found split wood dries roughly three times faster than whole rounds left intact.
Work every piece down until nothing measures more than 6 inches across the split face. Knock off loose bark as you go — extension foresters list bark removal among the simplest ways to cut drying time. Wear eye protection and gloves; a glancing maul strike throws chips.
Split on a chopping block at knee height, not on the ground. You get cleaner strikes, the maul stops in wood instead of dirt, and your back lasts the whole pile.
Pick a Sunny Spot With Moving Air
Sun and wind do more drying than any gadget. In multi-year seasoning trials, wood in an open sunny, windy location reached burn-ready moisture months ahead of wood kept shaded or under cover.
Choose the sunniest, breeziest part of your yard — ideally with the stack’s cut ends facing the prevailing wind. Keep the pile a few feet from buildings and fences so air circulates on all sides. Do not stack firewood tight against the house: it traps moisture against siding and invites termites and carpenter ants toward the structure.
Lift the Stack Off the Ground
Soil wicks moisture upward all season, even when it looks dry. Wood sitting on bare dirt reabsorbs water from below as fast as the sun pulls it from above.
Set two old pallets or a pair of 2×4 rails under every row. The air gap underneath dries the bottom course as quickly as the top and keeps the lowest logs from rotting into the soil.
Stack in Single Rows, Ends Facing the Breeze
Airflow is the whole game. Build single rows rather than deep piles — the center of a wide stack barely sees moving air. Leave a few inches between parallel rows so breezes pass straight through.
Point every cut end toward the wind. End grain releases moisture far faster than bark or side grain, so facing the ends into the breeze puts your fastest-drying surface to work. Keep rows no taller than about 4 feet for stability.
Cover the Top — and Only the Top
Rain undoes weeks of drying in a day, but a fully wrapped pile is worse than an uncovered one. Drape a tarp, plywood sheet, or scrap metal roofing over just the top of the stack, weighed down against wind. Leave all sides completely open.
Sealing the sides traps ground moisture and kills airflow — the classic beginner mistake that produces a moldy pile instead of dry wood. Cover from above, breathe from the sides. For the top row, stack pieces bark-side up so they shed rain like shingles.
Test With a Moisture Meter Until It Reads 20% or Less
Guessing is how wet wood ends up in the stove. A pin-type moisture meter costs little and settles every argument: split a test piece open and press the pins into the freshly exposed face — never the bark or the weathered ends.
Burn-ready means 20% moisture or below. Test at room temperature (cold wood reads low), and sample three or four pieces from different spots — the middle of the stack always lags behind the sunny ends.
End cracks look encouraging but lie — surface checking appears long before the center is dry. Trust the meter, not the wrinkles.
Confirm the Wood Is Ready Before You Burn It
Before the first fire of the season, run the full readiness check: meter reads 20% or less on fresh-split faces, ends show deep cracks, bark peels off easily, two pieces knocked together ring hollow instead of thudding, and the wood feels light for its size.
If anything fails, give it more time — burning marginal wood is how creosote builds up. And once you start burning, get the chimney inspected and swept before the next fire, and do not skip the yearly inspection after that.
Burning unseasoned wood coats the flue with creosote, and creosote is what fuels chimney fires. If you have been burning damp wood, stop, get the chimney inspected and swept before the next fire, and do not skip the yearly inspection after that.
| If This Happens | Try This |
|---|---|
| Musty smell or mold on the stack | Uncover the sides fully, restack looser with wider gaps, and move the pile into more sun and wind. |
| Meter still reads above 25% after a year | Split the thickest pieces smaller, confirm no ground contact, and rebuild as single rows instead of a wide pile. |
| Wood looks dry but hisses in the fire | Test a freshly split face — dry bark hides wet interiors. Give it more time or move it to a sunnier spot. |
| Stack keeps toppling over | Crib the ends by alternating log direction every layer, and keep rows no higher than about 4 feet. |
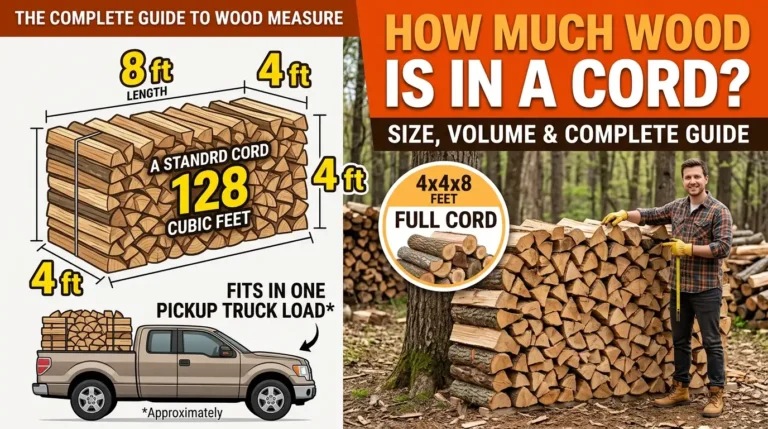
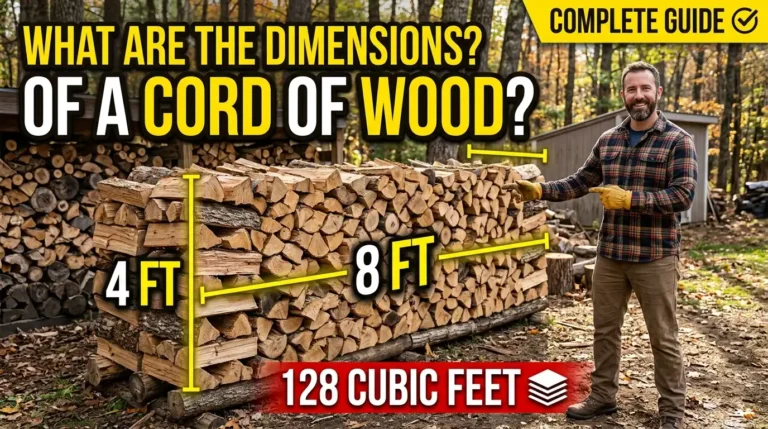
Seasoning is mostly a waiting game, but the setup decides how the waiting goes. Split small, stack loose, keep it off the ground, and let the sun and wind do the heavy lifting. Once you know how to season firewood to a true 20% or less, every winter gets warmer, cleaner, and cheaper — and your chimney will thank you. Next, make sure you are burning the right species: our guide to the best firewood to burn ranks which woods give the most heat per log. And if you buy by volume, learn what a face cord actually is so you know how much drying space you will need — a full cord of wood lasts most households a good while, which is all the more reason to season it right. Good woods to start with include ash firewood, which seasons faster than most hardwoods.
- Cut logs to firebox length (16″ fits most).
- Split everything 6″ or thinner.
- Choose a sunny, breezy spot away from the house.
- Raise the stack off the ground on pallets.
- Stack single rows, cut ends facing the wind.
- Cover only the top; leave sides open.
- Wait 6–18 months; meter-test fresh-split faces to 20% or less.
- Check cracks, color, sound, and weight before burning.