How to Clean a Patio Heater: A Complete Step by Step Guide for Every Type
Last updated: November 4, 2026
A dirty patio heater does more than look tired. Dust on the reflector bounces heat away from your chairs. Soot in the burner can make the flame weak or uneven. Grime on the base can hide rust before it becomes a real problem.
The good news is that most patio heater cleaning is simple work. You need warm soapy water, a few soft cloths, and a little patience. You do not need harsh chemicals or special tools for a routine clean.
This guide walks you through how to clean a patio heater safely, step by step. It covers freestanding propane heaters, tabletop models, electric heaters, and natural gas heaters. It also covers what to skip, when to stop, and when to call a professional.
Safety first: read this before you touch the heater
Never clean a heater that is hot, lit, or still connected to fuel. Turn the heater off, close the fuel supply, and let every part cool completely. For a propane heater, close the tank valve and disconnect the tank before you start.
Never use a propane or natural gas patio heater indoors, in a garage, or in any unvented enclosed space. Burning fuel in a closed space can build up carbon monoxide, a colorless and odorless gas that can be deadly. If you ever smell gas, do not light the heater and do not try to find the leak with a flame. Leave the area, and call your gas supplier or emergency services from outside.
If you find a damaged gas hose, a cracked regulator, a bent burner, or anything that looks like a gas leak, stop and call a licensed professional. Do not try to repair gas parts yourself. Your heater manual always wins over this guide, so check it first if your model has special instructions.
The Short Answer: How to Clean a Patio Heater
If you want the fast version, here it is. Turn the heater off, cut the fuel or power, and let it cool fully. Wipe the reflector and pole with warm soapy water and a soft cloth. Brush loose dust and cobwebs from the burner area with a soft brush. Wipe the emitter screen gently without pressing it in. Dry everything, check the hose and connections for damage, and test the heater outdoors before your next gathering.
A light clean takes about 20 to 30 minutes for a freestanding heater. A deep seasonal clean takes closer to an hour because it includes the base, the tank area, and a full inspection. The rest of this guide explains each step in detail so you can do the job with confidence.
Know Your Heater Type Before You Clean
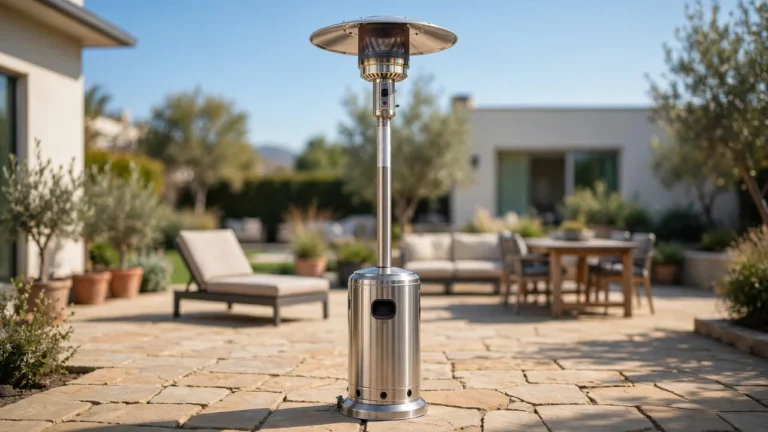
Cleaning steps change a little by heater type. A propane mushroom heater has a tall pole, a reflector dome, and a burner under that dome. A tabletop heater is a smaller version of the same idea. An electric infrared heater has heating elements and a reflector but no gas parts. A natural gas heater connects to a fixed gas line instead of a tank.
Use the table below to find your type and see what needs the most attention. Always follow your manual for parts that are unique to your model.
| Heater type | Parts that get dirtiest | Extra care needed |
|---|---|---|
| Freestanding propane | Reflector, burner, emitter screen, base | Check the hose, regulator, and tank connection every time |
| Tabletop propane | Reflector, small burner, base ring | Small parts bend easily, so use a light touch |
| Electric infrared | Reflector, heating element, vents | Unplug first and never spray water into vents or wiring |
| Natural gas | Reflector, burner, emitter screen | Never disconnect the gas line yourself, call a professional for gas work |
If you are still learning how your heater goes together, our guide to how to assemble and install a patio heater shows the main parts and where each one sits. That picture helps a lot when you are deciding what to wipe and what to leave alone.
What You Need for the Job
Gather your supplies before you start so you are not hunting for a cloth with soapy hands. Most of these items are already in your home.
- Bucket of warm water with a small amount of mild dish soap
- Two or three soft cloths or microfiber towels
- A soft bristle brush, such as an old paintbrush or a bottle brush
- A dry towel for drying parts right away
- Work gloves to protect your hands from sharp edges and grime
- White vinegar mixed half and half with water, for stubborn spots on metal only
- A step stool for reaching the reflector on a tall heater
Skip steel wool, abrasive pads, oven cleaner, and bleach. Abrasive pads scratch stainless steel and painted finishes, and those scratches rust faster. Harsh cleaners can also damage coatings and leave residue near the burner. If a spot will not come off with soapy water and a gentle rub, leave it and note it for your next inspection rather than scrubbing harder.
Step 1: Shut Down and Cool Down
Turn the control knob to off. For a propane heater, close the tank valve and disconnect the tank. For an electric heater, unplug the cord. For a natural gas heater, turn the control to off and leave the gas line alone.
Wait until the reflector, emitter screen, and burner are cool to the touch. This can take 30 minutes or more after use. Cleaning a hot heater can burn you and can bake soap onto hot metal, which is hard to remove later.
Move the heater to a shaded spot if you can. Direct sun dries soap too fast and leaves streaks on the reflector. A calm day is best, since wind blows dust right back onto wet parts.
Step 2: Wipe the Reflector Dome
The reflector is the wide dome at the top. It bounces heat downward, so a dusty reflector means less warmth at your table. Wipe it inside and out with a cloth dampened in warm soapy water.
Work in small sections and rinse your cloth often. For bird droppings or stuck on grime, lay a damp cloth over the spot for a few minutes to soften it, then wipe gently. Dry the reflector with a clean towel right away to stop water spots.
Check the reflector for dents while you wipe. A dented reflector still works, but a badly bent one can change how heat spreads. If the reflector wobbles or will not sit straight, tighten its fittings or ask a professional to look at it.
Step 3: Clean the Pole, Base, and Tank Housing
Wipe the pole from top to bottom with soapy water. Pay attention to joints and screw heads, where dirt and moisture collect. Dry each section as you go.
Clean the base and the tank housing next. Remove leaves, dirt, and spider webs from inside the housing. Check the base for rust spots, especially around the wheels and bolts. Light surface rust can be wiped clean and dried, but flaking rust or soft metal needs a professional opinion.
For a propane tank itself, wipe the outside with a damp cloth only. Never paint a propane tank a dark color, and never try to clean or repair the valve. If the tank looks damaged or very rusty, take it to your propane supplier for advice.
Step 4: Clean the Burner and Emitter Screen Gently
The burner and emitter screen sit under the reflector. This is the most delicate part of the job, so slow down here. Brush loose dust, cobwebs, and dead insects away with a soft brush. Do not poke tools into burner holes.
Wipe the outside of the emitter screen lightly with a barely damp cloth. Do not press the screen inward, and do not soak it. If soot is heavy or the screen is cracked, stop and get professional help rather than forcing a clean.
Never spray water, compressed air at high pressure, or cleaning spray directly into the burner. Water in the burner can cause lighting problems, and forcing dirt deeper into the burner makes things worse. A gentle brush and a light wipe are enough for routine cleaning.
Cleaning time planner: how long each part takes
Times are planning estimates for a routine clean, not manufacturer figures. A deep seasonal clean with a full inspection takes longer.
Step 5: Check the Hose, Regulator, and Connections
Cleaning day is the best day to inspect gas parts. Look at the full length of the hose for cracks, cuts, kinks, or chew marks. Check that fittings are snug but do not over tighten them.
Look at the regulator for damage or heavy corrosion. Check the tank connection area for dirt that could stop a good seal. Wipe fittings with a dry cloth only. Never use soap water as a leak test on your own unless your manual tells you how, and never test for a leak with a flame.
If you smell gas at any point, stop work, leave the area, and call your gas supplier or emergency services from outside. If a hose or regulator looks damaged, replace it only with a part made for your heater model, or have a professional do the job.
Step 6: Clean an Electric Patio Heater Differently
Electric heaters need a gentler approach. Unplug the heater and let it cool fully. Wipe the housing and reflector with a barely damp cloth, then dry them right away.
Brush dust from vents with a dry soft brush. Never spray water into vents, elements, or the control box. Never immerse any part of an electric heater in water. Check the cord for nicks, cracks, or heat damage, and stop using the heater if the cord is damaged.
If the heating element itself is dirty, wipe it only if your manual allows it, and only when the heater is unplugged and cool. Many electric heaters are best left with a dry brush clean on the element. When in doubt, contact the maker or an electrician.
Step 7: Dry Everything, Then Test the Heater Outdoors
Dry every part you washed before you reconnect fuel or power. Standing water on metal invites rust, and water near the burner can cause sputtering on startup.
Reconnect the tank or plug in the heater outdoors, in an open area away from walls, furniture, and overhead coverings. Check your clearance distances first. Our guide to patio heater clearance explains how much space to leave around and above the heater.
Light the heater using the normal startup steps in your manual. Watch the flame for a minute. It should be steady and even. If the flame is weak, yellow and sooty, or goes out, turn the heater off and work through the troubleshooting section below.
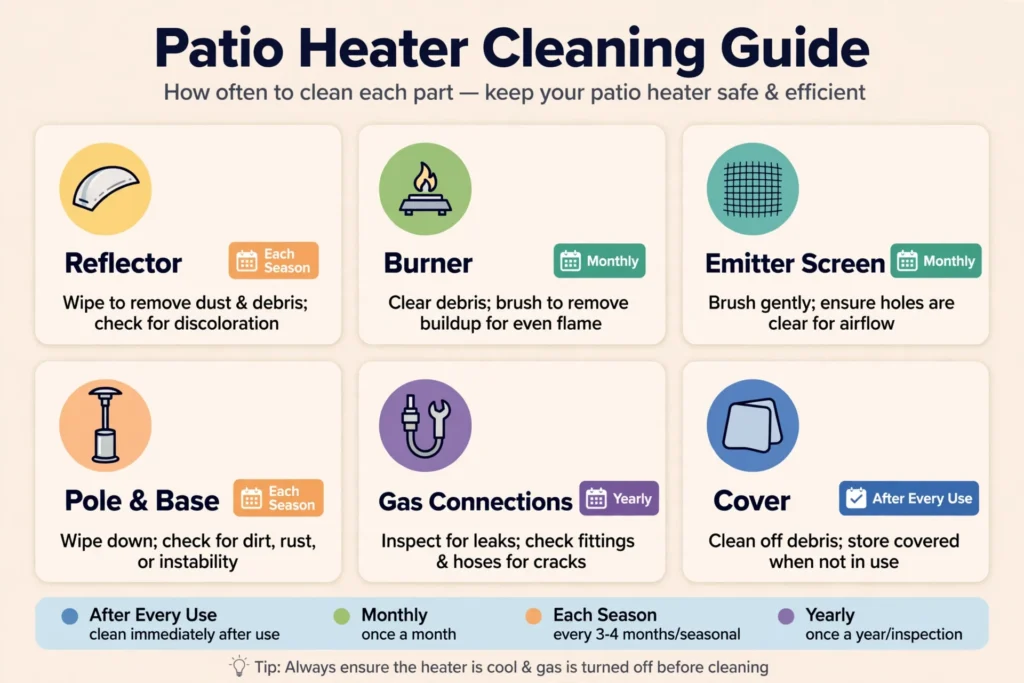
How Often Should You Clean a Patio Heater?
There is no single schedule that fits every home. A heater on a dusty patio near trees needs more cleaning than one on a covered porch. The table below gives a practical routine you can adjust to your own conditions.
| Part | Quick wipe | Deep clean | Why it matters |
|---|---|---|---|
| Reflector | Every few uses | At the start and end of the season | Dust cuts reflected heat |
| Burner and emitter screen | Brush off dust monthly in season | Once a season, gently | Buildup can weaken the flame |
| Pole and base | Monthly in season | At the start and end of the season | Stops grime hiding rust |
| Hose and connections | Visual check every use | Full inspection each season | Catches damage early |
| Cover and storage area | Shake out dust monthly | Wash before winter storage | Stops mold and trapped moisture |
As a rule of thumb, clean more often if you see soot, bird droppings, pollen film, or salt air buildup. Coastal homes and homes near busy roads collect grime faster. A quick wipe after a storm saves a long scrub later.
Troubleshooting After Cleaning
A heater that worked before cleaning but struggles after cleaning usually has a simple cause. Water in the burner, a loose connection, or a fitting that is not seated right are the most common culprits. Work through this table before you assume something is broken.
| Problem after cleaning | Likely cause | What to do |
|---|---|---|
| Heater will not light | Tank valve closed, loose tank connection, or damp burner | Check the valve and connection, let the burner dry fully, then try again outdoors |
| Flame goes out quickly | Dirty pilot area, wind, or low fuel | Brush the pilot area gently, shield from wind, and check the fuel level |
| Weak or uneven flame | Soot or dust left in the burner area | Let the heater cool, brush again gently, and retest |
| Yellow, sooty flame | Blocked air flow or burner buildup | Turn it off, cool it down, clear vents and the burner area, and seek help if it stays sooty |
| Gas smell | Loose fitting or damaged hose | Do not light it, leave the area, and call your gas supplier or emergency services |
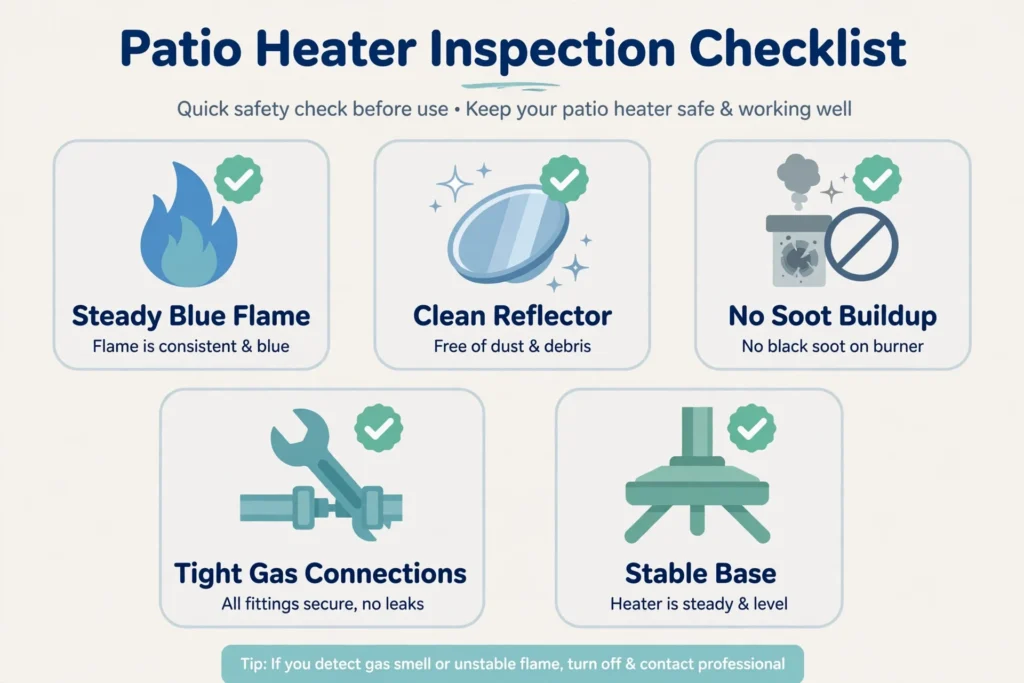
If cleaning does not fix a lighting problem, do not keep forcing it. Our guide to a patio heater that will not stay lit walks through the common causes in more detail, including the thermocouple and pilot parts that are best left to a professional.
Five Mistakes That Damage Patio Heaters
- Cleaning while hot. Hot metal burns skin and bakes soap into the finish. Always wait until every part is cool to the touch.
- Using a pressure washer. High pressure water forces dirt and moisture into the burner, joints, and gas parts. A bucket and cloth are safer and work better.
- Scrubbing the emitter screen hard. The screen is thin and dents easily. A dented screen can change the flame pattern, so use a light touch only.
- Spraying cleaner into the burner. Sprays and water in the burner cause lighting trouble and can push debris deeper. Brush gently instead.
- Skipping the dry step. Wet parts rust faster, especially at joints and screw heads. Dry everything before you store or relight the heater.
Seasonal Deep Clean and Winter Storage
At the end of the season, give the heater a full clean using the steps above, then inspect it once more before storage. Tighten loose bolts, note any rust or damage, and clean the cover before you put it on. A dirty cover traps moisture against the heater all winter.
Store a propane heater with the tank disconnected and stored outdoors in a ventilated spot, following your local rules and the tank maker guidance. Never store a propane tank indoors or in a garage. Cover the heater itself to keep dust and rain off, but make sure the cover fits loosely enough for air to move.
Before the first use next season, repeat the inspection steps. Check the hose, brush the burner area, wipe the reflector, and test fire the heater outdoors. A ten minute check at the start of the season prevents most first night surprises.
Cleaning also pairs well with planning your setup. If you are wondering whether your heater is the right size for your patio, see what size patio heater you need. And if running costs are on your mind, our guide to how much it costs to run a patio heater explains the factors that drive fuel use.
When to Call a Professional
Some jobs belong to a licensed gas technician or the heater maker, not to a homeowner with a cloth. Call a professional if you notice any of these signs.
- You smell gas, even faintly, at any point
- The hose, regulator, or gas line looks cracked, cut, or damaged
- The burner, pilot assembly, or emitter screen is bent, cracked, or broken
- The flame stays yellow and sooty after a gentle clean
- The heater has been dropped, tipped over hard, or damaged in a storm
- Your manual says a part needs dealer or technician service
Paying for one service visit is cheaper than replacing a heater damaged by a wrong repair, and far safer than guessing with gas parts. If you are ever unsure, stop and ask. That caution is part of good heater care, not a failure of it.
Cleaning Other Outdoor Heating Gear
The same habits help your other outdoor gear last longer. Wipe fire pit surfaces after they cool, clear ash before it gets wet, and check gas connections on any fuel burning appliance each season. Our guide to how to clean a fire pit covers that job in the same gentle, step by step style.
Frequently Asked Questions
How often should I clean my patio heater?
Wipe the reflector every few uses, brush the burner area monthly during the season, and do a deep clean with a full inspection at the start and end of each season. Clean more often in dusty, coastal, or high pollen areas.
Can I use a hose or pressure washer on a patio heater?
No. A garden hose or pressure washer can force water into the burner, joints, and gas parts and cause lighting problems. Use a bucket of warm soapy water and soft cloths instead.
What is the best cleaner for a patio heater?
Warm water with a small amount of mild dish soap is best for routine cleaning. For stubborn spots on metal, a half and half mix of white vinegar and water can help. Avoid steel wool, abrasive pads, oven cleaner, and bleach.
Can I clean the burner on a patio heater?
Yes, but gently. Brush loose dust and cobwebs away with a soft brush and wipe the outside of the emitter screen lightly with a barely damp cloth. Do not poke tools into burner holes, press the screen inward, or spray water into the burner.
Why does my patio heater flame look weak after cleaning?
A weak flame after cleaning is often caused by a damp burner, a loose tank connection, or dust left in the burner area. Let the heater dry fully, check the connections, brush the burner area again gently, and retest outdoors. If the problem stays, seek professional help.
Is it safe to clean a gas patio heater myself?
Routine surface cleaning is safe if the heater is off, cool, and disconnected from fuel, and you follow your manual. Gas repairs, hose replacement beyond a maker approved part, and any work on the gas line should be left to a licensed professional.
Should I clean my patio heater before storing it for winter?
Yes. Clean and dry the heater, inspect the hose and fittings, and clean the cover before storage. Store propane tanks disconnected and outdoors in a ventilated spot, and never store a propane tank indoors or in a garage.
Can I use my patio heater indoors after cleaning it?
No. Cleaning does not make a fuel burning patio heater safe indoors. Never use a propane or natural gas patio heater indoors, in a garage, or in any unvented enclosed space, because burning fuel can build up deadly carbon monoxide.
Final Checklist Before You Put the Cloths Away
Run through this short list and you are done. Heater off, cool, and disconnected before cleaning. Reflector wiped inside and out and dried. Pole, base, and tank housing wiped and dried. Burner brushed gently with no water sprayed inside. Hose and fittings inspected with no damage found. Electric cord checked if your heater is electric. Heater test fired outdoors with a steady flame.
A clean patio heater looks better, heats better, and lasts longer. More importantly, the inspection built into the cleaning routine catches small problems while they are still easy to fix. Put a reminder on your calendar for the next wipe down, and your heater will be ready whenever the evening turns cool.
Note: This guide gives general homeowner information only. Always follow your heater manual and local codes, and call a licensed professional for gas work or any repair you are unsure about.