How to Build an In-Ground Fire Pit in Your Backyard
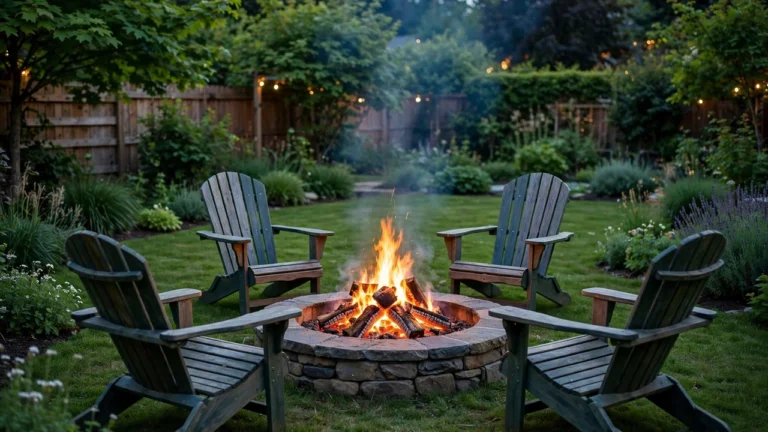
An in-ground fire pit sits low in the yard, with its fire bowl sunk into the earth and a stone ring flush with the grass. It looks calm and settled in a way a metal bowl on legs never quite does. This guide walks you through the whole build, from checking local rules to lighting the first small fire.
Plan on a full weekend for the work, with most of the time going to digging and hauling. The digging is the hard part. The stacking is the satisfying part, and you will see the shape of the pit come together course by course.
Read the safety notes before you pick up a shovel. A pit in the wrong spot, or over a buried line, turns a weekend project into a real problem. The checks at the start of this guide take an hour or two, and they protect everything that follows.
Read This Before You Dig
Call 811 before you dig, and wait until buried lines are marked. In the United States, 811 is the national call-before-you-dig number, and marking is free in most areas. Check your city or county rules for permits, burn bans, and required distances from houses, fences, and trees before you break ground.
Never burn treated, painted, or stained wood, plywood, or household trash. The fumes can be toxic, and the ash can carry harmful residue. Burn dry, seasoned firewood only.
Never leave a fire unattended, and put every fire out cold before you go inside. If your plans involve a gas line, electrical work, or a retaining wall, bring in a licensed professional for that part of the job.
What You Need
- Round-point shovel and a flat spade
- Wheelbarrow and a tarp for spoil
- Tape measure, stakes, and string
- Marking paint or flour for the circle
- 4-foot level and a hand tamper
- Work gloves and eye protection
- Wall block or natural stone for the ring
- Washed gravel for drainage
- Coarse sand for leveling
- Steel fire ring insert (strongly advised)
- Fire brick (optional, for the inner wall)
- Dry, seasoned firewood for the first fire
A steel ring insert is worth the trip to the store. It shields the stone from direct flame, and stone that faces flame day after day can crack and flake. Buy the insert before you dig, so the hole matches its size.
At a Glance: The 10 Steps
- Check local rules and call 811
- Pick a spot with room to spare
- Mark the circle on the ground
- Cut the sod and dig the hole
- Level and tamp the base
- Add the gravel drainage layer
- Set the stone ring course by course
- Backfill around the ring and finish the edge
- Light a small first fire
- Put the fire out cold
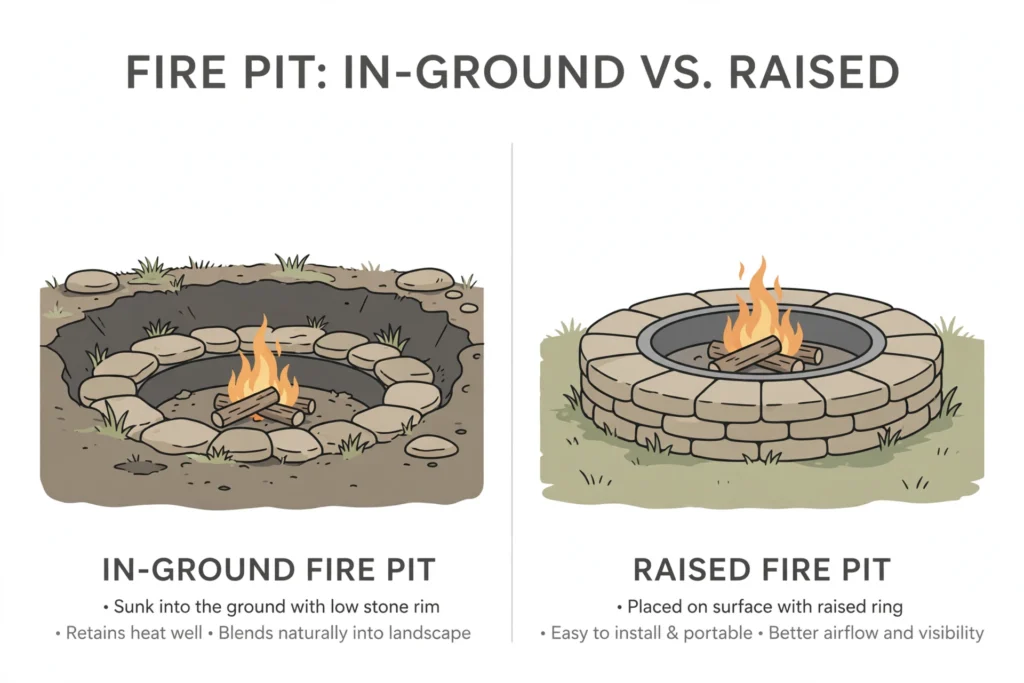
In-Ground or Above-Ground: Which Fits Your Yard?
An in-ground pit hides its bulk below grade, so the yard keeps its sight lines and the fire feels tucked in. An above-ground ring is faster to build and easier to move, but it stands out in the lawn and needs a level pad of its own. If you want a permanent gathering spot and you are willing to dig, the in-ground style pays off for years.
Drainage is the one drawback to weigh. A bowl in the ground collects rain, so the gravel layer in Step 6 is not optional. If your yard holds water after rain, or the spot you picked sits at the low end of a slope, pick higher ground or plan on a different style. A standard above-ground fire pit build suits wet yards better.
Pick a Size Before You Buy Stone
Size drives every other decision: how much you dig, how much gravel you order, and how many blocks you carry home. A 36-inch pit suits two to four people and a modest fire. A 42-inch pit is the middle ground most yards handle well. A 48-inch pit seats a crowd but means a wider hole and more stone.
Depth matters as much as width. The bowl needs room for a gravel bed plus a fire that sits below grade, without turning into a deep hole that starves the fire of air. The table below gives starting points. Adjust to your stone, your insert, and your local rules.
| Pit size | Inside diameter | Total dig depth | Gravel layer | Ring courses |
|---|---|---|---|---|
| Small | 36 inches | 12 inches | 4 inches | 2 |
| Medium (most yards) | 42 inches | 15 inches | 5 inches | 2–3 |
| Large | 48 inches | 18 inches | 6 inches | 3 |
Depths are measured from the surrounding grade to the bottom of the hole. Ring courses depend on block height.
Worked Example: How Much Gravel for a 42-Inch Pit?
A 42-inch pit has a radius of 21 inches, or 1.75 feet. The area of the floor is about 9.6 square feet (3.14 × 1.75 × 1.75). A 5-inch gravel layer is 0.42 feet deep, so the gravel volume comes to about 4 cubic feet, roughly 0.15 cubic yards.
Order a little extra. Gravel settles into the soil, and a half-full wheelbarrow on the second trip costs more time than a spare bag costs money. Keep the leftover gravel for topping up the pit floor each spring.
Step 1: Check Local Rules and Call 811
Rules differ by city, county, and neighborhood, so the first call is to your local authority or fire department. Ask whether a permit is needed, whether open burning is allowed at your address, and what distance your pit must keep from buildings, fences, and property lines. Write the answers down. Memory fades, and a note on the fridge settles later arguments.
Call 811 at least a few days before you plan to dig, then wait for the marking visit. Crews mark buried gas, electric, water, and telecom lines with paint or flags, and you must keep the marks visible until the digging is done. If a mark crosses your chosen spot, move the pit. Digging through a marked line is dangerous and can carry a fine.
Check for burn bans on the day you plan to light the first fire, not only on the day you dig. Bans change with weather and drought, and a pit built in a wet spring may sit unused through a dry summer. A homeowners association may add its own rules, so check those too.
Step 2: Pick a Spot With Room to Spare
Walk the yard and look up, not only around. Low branches, power lines, and a wooden pergola above the pit are all problems, since heat and sparks rise straight up. The spot should be flat, or close to it, so chairs sit level and rain does not funnel into the bowl.
Give the pit breathing room on every side. Your local rules set the exact distances, and our guide to fire pit clearance from houses, trees, and fences walks through how to measure them. Keep the pit clear of dry brush, mulch beds, and overhanging limbs, and leave a path wide enough to carry firewood without tripping.
Think about smoke. A pit tucked against a fence sends smoke straight into the neighbor’s patio, while a pit in open air lets it rise and drift. Stand in the spot on a breezy evening and watch which way the wind usually moves before you commit.
Step 3: Mark the Circle on the Ground
Drive a stake at the center of your chosen spot. Tie a string to the stake, measure out half your pit diameter along the string, and tie a marking can or a sock full of flour at that point. Walk the string around the stake to draw a full circle on the grass.
Mark a second, wider circle for the stone ring itself. The ring wall sits outside the bowl, so the hole you dig must fit the insert plus the wall thickness. For a 42-inch bowl with 6-inch block, the outer circle lands near 54 inches across. Measure the block you bought, not the block in a photo, since sizes vary.
Step back and look at the circle from the patio and from the house. This is the last cheap moment to move the pit. Once the sod is cut, moving it means repairing a hole.
Step 4: Cut the Sod and Dig the Hole
Cut around the outer circle with a flat spade, then slice the sod inside the circle into manageable squares. Lift the squares and stack them on the tarp, grass side down, in case you need them to patch the lawn later. The topsoil goes in a separate pile from the deeper soil, since you will want the topsoil back for backfill.
Dig in layers of about 4 inches at a time, working around the circle rather than attacking the middle. Check depth with the tape measure as you go, and keep the walls as vertical as you can. A wheelbarrow parked beside the hole beats a growing pile of spoil on the lawn.
Clay soil fights back, and rocky soil fights harder. A mattock breaks up stubborn ground, and a digging bar pries out stones that a shovel will not move. If you hit a large rock, a buried pipe, or anything that looks like a cable, stop and reassess before forcing it.
Heads Up: Keep the Hole Honest
A hole that narrows at the bottom leaves no room for the ring wall, and a hole dug too deep starves the fire of air. Measure depth at four points around the circle, not only in the middle. Fix a shallow corner now, while the shovel is already in your hand.
Step 5: Level and Tamp the Base
Spread a thin layer of coarse sand, about 1 inch, over the floor of the hole. The sand fills small dips and gives the gravel a smooth bed to sit on. Rake it flat, then lay the level across the floor in two directions and look for rocking or gaps.
Tamp the floor with a hand tamper until it feels firm underfoot. Soft spots will settle later, and settling under one side of the ring tilts the whole wall. Add a little more sand to any low corner, tamp again, and recheck with the level before moving on.
Step 6: Add the Gravel Drainage Layer
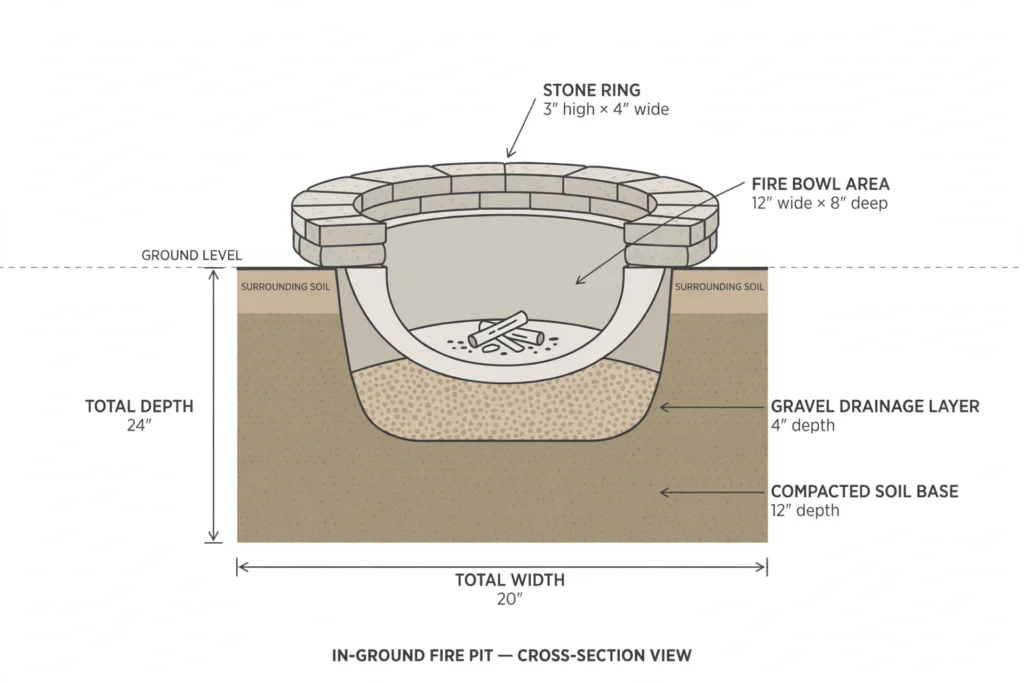
Pour washed gravel into the hole to the depth from the size table: 4 inches for a small pit, 5 inches for a medium pit, 6 inches for a large one. Rake it level, then tamp it lightly. The goal is a firm bed that still lets water pass through, so do not pound it into a solid slab.
Washed gravel matters here. Unwashed stone carries dust and fine soil that clog the gaps water needs to drain through. If the bag or pile looks dusty, rinse it with a hose before it goes in the hole.
Step 7: Set the Stone Ring Course by Course
Set the steel ring insert in the center of the hole first, if you bought one. The insert sets the inner edge of the bowl, and the stone wall builds up around it. Check that the insert sits level and does not rock on the gravel.
Lay the first course of block or stone tight against the insert, checking level as each piece goes down. Stagger the joints on the second course so no seam lines up with the seam below it. Staggered joints hold the wall together the way bricks hold a wall, and a stacked seam is the first place a wall shifts.
Tap each stone down with a rubber mallet rather than a steel hammer, which chips block faces. Step back after each course and sight along the top. A course that leans now will lean worse under the next course, and rebuilding a crooked ring costs more effort than leveling one stone at a time.
For a closer look at stacking stone for a raised pit, see our guide to building a stone fire pit. The joint and leveling habits are the same, even though the finished height differs.
Step 8: Backfill Around the Ring and Finish the Edge
Fill the gap between the ring wall and the hole wall with gravel or soil, packing it in layers of a few inches. Backfill braces the wall from outside, so a wall with loose fill behind it will shift the first time someone leans on it. Tamp each layer lightly as you go.
Top the backfill with the saved topsoil and press it flush with the surrounding lawn. Lay flat cap stones or a ring of pavers around the outer edge if you want a clean border and a place to rest feet. Keep the cap stones level with the grass so a mower passes over them without catching.
Sweep loose gravel and soil out of the bowl before the first fire. Debris in the bowl smokes, and a clean bowl lets you see the gravel bed you worked to level.
Step 9: Light a Small First Fire
Keep the first fire small on purpose. A modest fire lets you watch how the pit draws air, where smoke goes, and whether any stone shifts with heat, without a large blaze to manage. Use dry, seasoned firewood and a simple top-down or teepee lay, and keep a hose or a bucket of water within reach.
Burn only wood you know is safe. Our guide to what you can burn in a fire pit lists the woods and materials to avoid, and the reasons behind each one. If you need a refresher on fire lays, see how to start a fire in a fire pit.
Watch the first fire from a chair, not from the house. Note which side the smoke favors, whether the gravel bed stays dry, and whether any stone feels loose after cooling. Small fixes after a small fire beat big repairs after a big one.
Step 10: Put the Fire Out Cold
Stop adding wood at least 30 minutes before you plan to go inside. Spread the coals out with a poker so they cool faster, then douse them with water a little at a time. Pouring a full bucket at once sends up a cloud of steam and ash.
Stir the wet ash with the poker and douse again. Repeat until nothing hisses and the ash feels cold when you hold a hand a few inches above it. Coals can hide heat under a gray crust for hours, and a pit that looks dead can still hold a live coal.
Never leave a fire unattended at any point, including the cooling stage. If you must leave, the fire must already be out cold. Cover the pit with a fitted cover or a sheet of metal between uses to keep rain and leaves out of the bowl.
Fixing Common Problems
Most in-ground pit troubles trace back to water, air, or a wall that moved. The table below covers the three complaints that come up most often, with the fix that addresses the cause rather than the symptom.
| If this happens | Try this |
|---|---|
| Water pools in the bowl after rain | Top up the gravel bed to its full depth, clear debris from the bowl, and check that the surrounding ground slopes away from the pit rather than toward it. |
| The fire smokes heavily or will not stay lit | Burn dry, seasoned wood only, build a smaller lay, and check that the bowl is not dug so deep that air cannot reach the fire. |
| A stone shifts or the ring leans | Lift the loose stones, relevel the gravel beneath them, restack with staggered joints, and pack the backfill firmly behind the wall. |
Keeping the Pit in Good Shape
Scoop ash out of the bowl after every few fires, once it is fully cold. Ash buildup holds moisture against the gravel and the stone, and a deep ash bed makes the next fire harder to light. A metal ash bucket with a lid keeps the mess contained.
Top up the gravel each spring. Foot traffic, rain, and ash removal all thin the bed over time, and a thin bed drains poorly. Walk the ring once a season and reset any stone that has shifted, before a small lean becomes a rebuild.
Frequently Asked Questions
How deep should an in-ground fire pit be?
Dig 12 to 18 inches below grade, depending on pit size, with 4 to 6 inches of that depth filled by a gravel drainage layer. A 36-inch pit works at 12 inches deep, while a 48-inch pit needs closer to 18 inches. Check your local rules first, since some areas set their own depth or clearance limits.
Do I need a permit to build an in-ground fire pit?
It depends on where you live. Some cities require a permit for any open-burning feature, while others only ask that you follow distance and burn-ban rules. Call your city or county office and your fire department before you dig, and keep a note of what they tell you.
Can I build an in-ground fire pit under a tree?
No. Heat and sparks rise into branches, and a fire under a canopy is a fire risk even on a calm night. Pick an open spot with no branches, power lines, or structures overhead, and confirm the required distances with your local rules.
What kind of stone works best for an in-ground fire pit?
Concrete wall block and dense natural stone both work well, and a steel ring insert protects either one from direct flame. Avoid river rock and any stone that has been sitting in water, since trapped moisture can make stone crack or pop when heated. Dry-stack the wall without mortar so individual stones can be reset later.
How do I keep water from pooling in my in-ground fire pit?
Use a full gravel drainage layer, keep the surrounding ground sloping away from the pit, and cover the pit between uses. If water still pools, the gravel bed may be clogged with ash and fine soil, so scoop the bowl out and top the gravel back up to its full depth.
Can I cook over an in-ground fire pit?
Yes, with the right setup. Use a grill grate rated for open flame, supported above the fire rather than resting on the stone, and burn dry hardwood only. Keep cooking fires small, watch them closely, and never cook over treated wood, painted wood, or trash.
Quick Reference Card
You need: Shovel, spade, wheelbarrow, tape measure, stakes and string, level, tamper, gloves, eye protection, wall block or stone, washed gravel, sand, steel ring insert.
Size: 36–48 inches inside diameter; dig 12–18 inches deep; gravel layer 4–6 inches.
Steps: Check rules and call 811 → pick a spot → mark the circle → dig → level and tamp → gravel → set the ring → backfill → small first fire → out cold.
Your Turn to Dig
An in-ground fire pit rewards the slow work at the start: the rules checked, the lines marked, the hole measured twice. The wall goes up fast once the base is right, and the first small fire tells you the pit was built well.
Take your time with the digging, keep the safety checks in place for every fire after the first, and enjoy the spot you made. A low stone ring, a small fire, and chairs in a circle are all a backyard evening really needs.