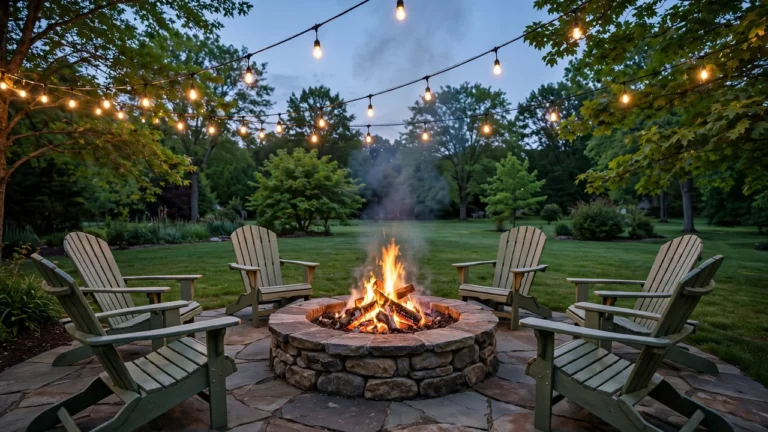
How to Build a Stone Fire Pit: A Beginner’s Step-by-Step Guide
Safety note: Building and using a fire pit involves fire, heavy stone, and digging tools. Check your local rules and burn bans before you start, keep children and pets clear of the work area and every fire, and never leave a fire unattended. If any part of the job feels beyond your skill level, call a licensed professional for help.
Learning how to build a stone fire pit is one of the most rewarding weekend projects for a backyard. A stone ring gives you a steady place for evening fires, and it looks at home next to a patio, a lawn, or a garden path. This guide walks you through the whole build in seven clear steps, with no mortar and no special masonry skill needed.
You will start by picking a safe spot, then dig a shallow base, stack dry-laid stone rings, and finish with a small first fire. The whole project uses basic tools you may already own, plus stone, gravel, and sand from a landscape supplier. Take your time with the base and the first ring, since those two parts decide how level and steady the finished pit will be.
Before you buy stone, read your local fire rules. Some towns limit open fires, require a permit, or set minimum distances from buildings and trees. Rules vary a lot by area, so a quick check with your local fire department or town office can save you from moving a finished pit.
One weekend (about 6–8 hours of work)
Beginner-friendly
1–2 adults
What You Need
Tools: shovel, garden rake, hand tamper, level, tape measure, wheelbarrow, work gloves, safety glasses, string and two stakes, and a garden hose or bucket of water.
Materials: dry-laid stone blocks or wall stone (enough for 3–4 rings), a steel fire ring insert (optional but helpful), landscape fabric (optional), gravel for the base, coarse leveling sand, and dry, seasoned firewood for the first fire.
Stone tip: choose dry, dense stone made for fire pit walls or landscape walls. Avoid porous stone, river rock, and any stone that feels damp inside, since trapped water can crack stone when it heats up. If you buy a kit, follow the maker’s guidance on which stone to use and how high to stack it.
At a Glance
- Pick a safe spot with clear space around it.
- Mark the circle and clear the ground.
- Dig and level the base.
- Lay the gravel and sand base.
- Stack the first stone ring.
- Build up the walls.
- Light a small first fire.
Step 1: Pick a Safe Spot
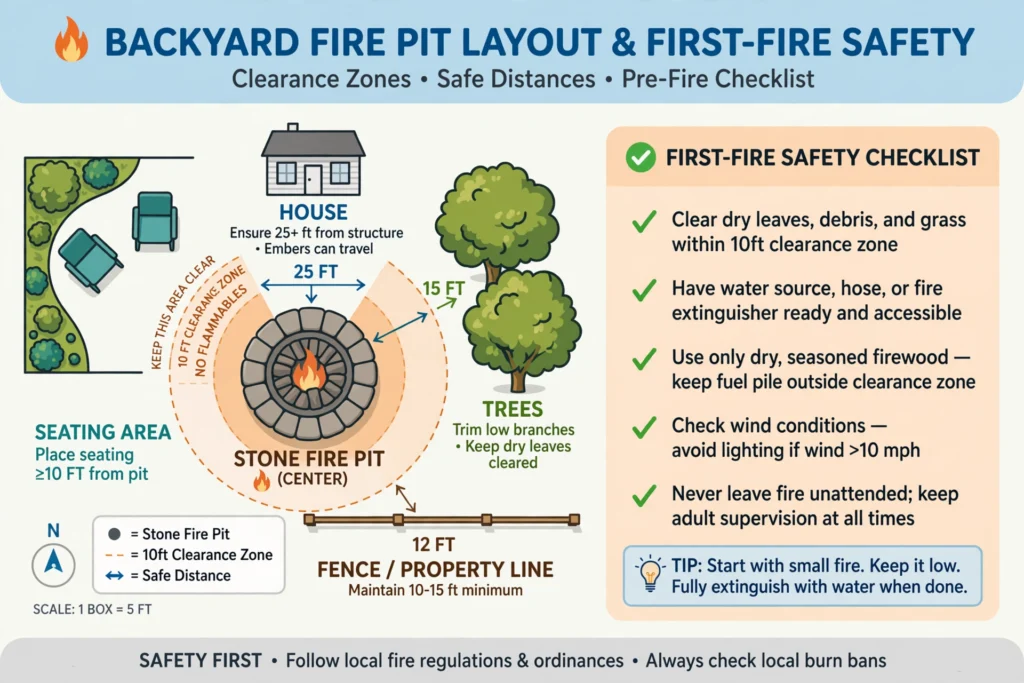
Walk your yard and look for a flat area with open sky above it. Keep the pit clear of the house, fences, sheds, low tree branches, and anything that can catch fire. Your local rules set the exact distances, so check those first and measure from the edge of the pit, not from its center.
Flat ground matters as much as clearance. A slope makes the base hard to level and lets the wall shift over time. If your yard has no flat spot, plan to level a small area with extra gravel rather than building on a slope. For help measuring safe distances, see our guide to fire pit clearance from houses, trees, and fences.
Also check what sits below the surface. Call your local utility marking service before you dig, and stay clear of buried lines. Check the burn rules for your area too, since some places ban open fires on dry or windy days. Our guide to backyard fire pit rules explains what to check before your first fire.
Step 2: Mark the Circle and Clear the Ground
Drive one stake into the center of your chosen spot. Tie a string to it, measure out 24 inches along the string, and walk a full circle while marking the ground with marking paint or a line of flour. This gives you a pit with an outside diameter of about 48 inches, a good size for a family fire.
Clear grass, roots, and loose debris from inside the circle, plus a border of about 12 inches around it for a gravel safety ring. Pull out large roots by hand or with a mattock, and rake the area smooth. Keep the cleared area free of dry leaves while you work, since sparks and dry leaves do not mix.
Step 3: Dig and Level the Base
Dig inside the circle to a depth of about 6 inches. Work in even passes with the shovel, and check the depth in several spots with the tape measure. A base that is level now means a wall that stacks straight later, so do not rush this step.
Use the rake to smooth the bottom, then press the soil down with the hand tamper. Set the level across the hole in a few directions and scrape high spots down until the bubble reads level. If the ground drains poorly, a slightly deeper gravel layer in the next step will help water move away from the pit.
Step 4: Lay the Gravel and Sand Base
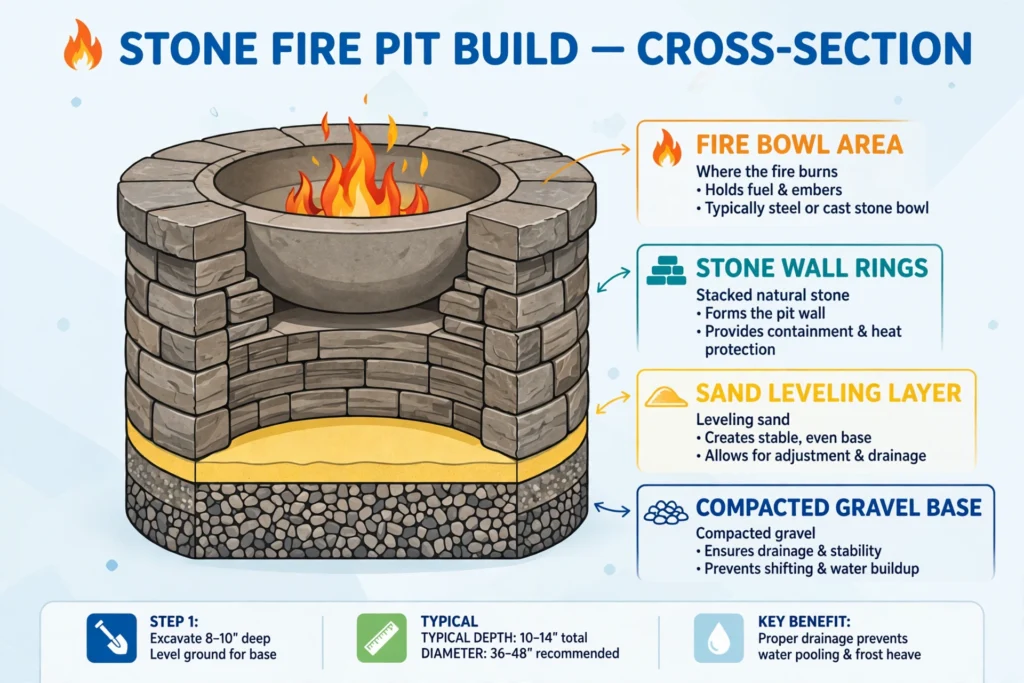
Pour in about 4 inches of gravel and spread it with the rake. Tamp it down in two thin layers instead of one thick layer, since thin layers pack tighter and shift less. The gravel gives the pit drainage, so rainwater does not pool under the fire.
Spread about 1 inch of coarse sand over the gravel and level it with a straight board. This sand layer lets you fine-tune the first stones so they sit level. Step back and check the surface from a few angles before you move on.
Step 5: Stack the First Stone Ring
Set the first stones on the sand, one at a time, following the marked circle. Press each stone down and wiggle it slightly until it sits firm and level. Check each stone with the level as you go, and add or remove a pinch of sand under stones that sit high or low.
Leave small, even gaps of about half an inch between stones if you plan to use a steel fire ring insert, since the insert needs room to fit. Without an insert, butt the stones close together for a tight ring. This first ring sets the shape of the whole pit, so take the time to get it right.
Step 6: Build Up the Walls
Stack the second ring so each stone bridges the joint between two stones below it, like bricks in a wall. This staggered pattern locks the rings together and keeps the wall strong. Aim for a finished wall height of about 12 to 18 inches above the ground, which usually means 3 to 4 rings of standard wall stone.
Check the wall for level after each ring, and tap stones into place with a rubber mallet if they rock. Set a steel fire ring insert inside the stone wall if you have one, since it shields the stone from direct flame and makes ash cleanup easier. If you are building a different style of pit first, our guide on how to build a fire pit covers the basic layout choices.
Step 7: Light a Small First Fire
Keep the first fire small. A small fire lets the stone warm up slowly and lets you check that smoke drifts clear of the house and seating. Use only dry, seasoned firewood, and never burn treated or painted wood, trash, or yard waste, since those release harmful smoke and can damage the pit.
Build a small fire lay in the center, light it with a long match or lighter, and stay with the fire the whole time. Keep a hose or bucket of water close by, and keep children and pets at a safe distance from the pit. When you finish, drown the fire with water, stir the ashes, and check that every ember is cold to the touch before you leave it. For the full lighting method, see how to start a fire in a fire pit.
Common Mistakes to Avoid
- Building too close to the house or trees. Clearance rules exist because embers travel. Measure from the pit edge and check local rules before you dig.
- Skipping the gravel base. Stone set straight on soil shifts with rain and frost. Gravel drains water and keeps the pit level.
- Using wet or porous stone. Stone that holds water can crack when heated. Use dry, dense stone and follow the kit maker’s guidance.
- Burning the wrong fuel. Treated wood, painted wood, and trash give off harmful smoke. Burn only dry, seasoned firewood.
- Leaving the fire early. A fire is done only when every ember is cold. Drown, stir, and check again before you walk away.
Frequently Asked Questions
Do I need mortar for a stone fire pit?
No. A dry-laid stone pit stacks without mortar and works well for a standard backyard pit. Mortar is only needed for taller walls or a mortared design, and that job is best left to a mason.
What kind of stone is safe for a fire pit?
Use dry, dense stone sold for fire pits or landscape walls. Avoid porous stone, river rock, and damp stone, since trapped water can crack stone when it heats. If you buy a kit, follow the maker’s stone guidance.
How far should a stone fire pit be from my house?
Distance rules vary by town, county, and fire code, so check your local rules before you build. As a planning habit, give the pit generous clear space from the house, fences, sheds, and low branches, and measure from the pit’s edge.
Can I build a stone fire pit on grass?
Yes, if you dig out the grass and build a gravel base first. Never set a fire directly on grass or on bare soil without a base, since heat scorches the ground and the pit will shift. A gravel ring around the pit also catches stray sparks.
How do I clean a stone fire pit?
Wait until every ember is cold, then scoop out ash with a metal shovel and brush the stones. Wash soot off the stone with water and a stiff brush, and clear ash often so it does not hold moisture against the stone. See our guide on how to clean a fire pit for the full routine.
Quick Reference Card
- Pit size: about 48 inches outside diameter
- Base dig: about 6 inches deep
- Gravel layer: about 4 inches, tamped in two layers
- Sand layer: about 1 inch, leveled smooth
- Wall height: about 12 to 18 inches (3–4 rings)
- Fuel: dry, seasoned firewood only
- Finish: drown, stir, and check every ember is cold
A stone fire pit is a project most beginners can finish in a weekend, and the result lasts for years with basic care. Keep the base level, the stone dry and dense, and the first fire small, and you will have a safe spot for many evenings outside. Clear the ash after fires, check the wall each spring, and enjoy the pit you built with your own hands.