How to Build a Fire Pit That’s Safe, Sturdy, and Ready by Sunday
A backyard fire pit is one of those projects that looks harder than it is. No mortar, no special skills, no contractor — how to build a fire pit comes down to picking a safe spot, digging a shallow hole, and stacking blocks in level rings. One weekend of work gets you a permanent gathering spot you will use for years.
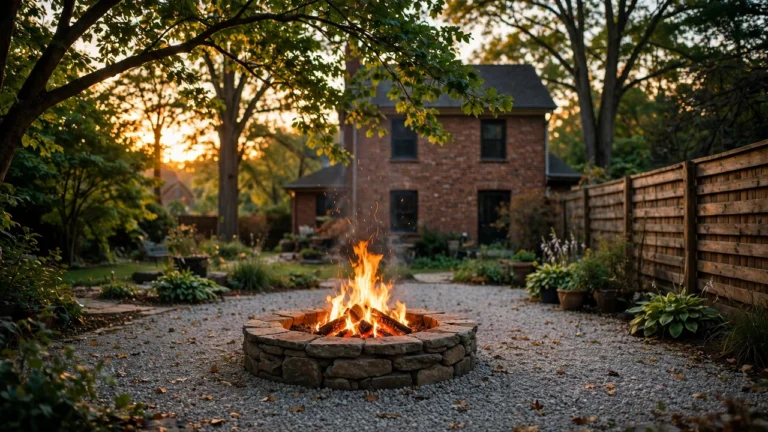
Here is what this guide delivers: a stone fire pit about 4 feet across and 4 courses high, built from retaining wall blocks with a steel fire ring inside. Total build time is roughly 4 to 6 hours of hands-on work plus a trip to the home center. No masonry experience needed.
Safety note before anything else: fire codes are local. Some towns require a permit, many ban open burning during dry months, and HOAs often have their own rules. Check all three before you dig. And call 811 — the national “call before you dig” line — so you don’t hit a buried utility line.
- Check the rules before you lift a shovel
- Measure 25 feet from anything that burns
- Mark a 4-foot circle on level ground
- Dig out 6 inches of soil
- Spread 2 inches of gravel and tamp it flat
- Set the first course of blocks dead level
- Stack three more courses, staggering the joints
- Drop in the steel ring and fill the base with lava rock
- Light a small test fire
Check the rules before you lift a shovel
Skipping this step is how people end up with a fine and a dismantled fire pit. Call your city or county fire office and ask two questions: do I need a permit, and are there burn restrictions right now? Many places ban open burning during dry spells, and some require a permit no matter the weather.
Call 811 at least a few days before you dig — it is the free national line that marks buried gas, electric, and cable lines. If you have an HOA, check its rules too; some ban wood fires outright or limit pit size. Ten minutes of phone calls now saves a world of trouble later.
Measure 25 feet from anything that burns
How far should a fire pit be from a house? The model fire code used across much of the US (International Fire Code §307.4.2) says recreational fires must stay at least 25 feet from any structure or combustible material. Many local fire departments set a 10-foot minimum instead. The honest answer: follow whichever rule is stricter where you live.
Measure from the pit’s edge to the house, garage, shed, fence, deck, and any low tree branches — radiant heat alone can ignite foliage overhead, so look up as well as around. A level spot on bare dirt, gravel, or pavers works best. Never build on a wooden deck or directly on grass.
Mark a 4-foot circle on level ground
Four feet across is the sweet spot for a backyard pit: big enough for a real fire and a ring of chairs, small enough to stay within most local size limits (many cap recreational fires at 3 feet of fuel area, and the pit walls sit outside that).
Drive a stake at the center, tie a 2-foot string to it, and walk the string around with a can of marking paint. That gives you a clean 4-foot circle. Eyeballing this step is the classic mistake — an off-center dig means a lopsided pit you will notice every single evening.
Dig out 6 inches of soil
Dig inside your painted circle down about 6 inches, keeping the bottom as flat as you can. This shallow excavation does two jobs: it anchors the pit so the walls can’t wander, and it drops the fire below grade where wind can’t get under it as easily.
Check the bottom with your level in a few directions. Perfection isn’t required — the gravel base forgives small dips — but a big slope now becomes a leaning wall later. Haul the dug soil to a garden bed; you’ll want it out of the way.
Spread 2 inches of gravel and tamp it flat
Pour gravel into the hole until you have roughly 2 inches of coverage, then tamp it down hard with a hand tamper. This base layer is drainage: without it, rain pools under the fire and turns the pit into a muddy mess that steams instead of burns.
Walk the tamper across the whole circle twice. The surface should feel firm underfoot, not crunchy. If your soil drains poorly (heavy clay), go a little deeper on the gravel — an extra inch here is cheap insurance against a swampy pit.
Buy 4 to 6 extra blocks beyond your count. One always chips during handling, and having matching spares on hand beats a second trip to the store — or a mismatched repair years later.
Set the first course of blocks dead level
This is the step that decides whether your pit looks professional or homemade. Lay your retaining wall blocks in a ring on the tamped gravel, checking each block with the 4-foot level both along the ring and across it. Tap high blocks down with a rubber mallet; shim low ones with a scoop of gravel.
Take your time here — every course above copies the first one. A first course that’s off by half an inch becomes a visible lean by the fourth course, and there’s no easy fix once the wall is stacked.
Stack three more courses, staggering the joints
Build the wall up to 4 courses total, offsetting each course so every block straddles the joint below it — the same running-bond pattern as a brick wall. Staggered joints lock the ring together; stacked joints create a weak seam that can shift.
Dry-stack the blocks (no mortar needed for this design). The weight of the blocks plus the interlock of the pattern holds everything in place, and dry stacking lets you replace a cracked block in minutes years from now.
Drop in the steel ring and fill the base with lava rock
Set a 36-inch steel fire ring inside the block wall — it should sit just inside the blocks with a small gap. Then fill the pit floor with a few inches of lava rock or coarse sand. This is the layer the fire actually sits on, and it protects the base while improving airflow.
Use lava rock or coarse sand here, not pea gravel: small rounded pebbles can trap steam and pop under high heat. Rake the fill level so the fire sits a few inches below the top of the wall.
Standard concrete and retaining wall blocks can spall or crack explosively when flame hits them directly — trapped moisture inside the block turns to steam and blows chips off the surface. Never burn directly against bare concrete blocks. The steel ring (or a firebrick liner) takes the heat; the blocks are just the pretty outer wall. This is the single most important safety detail of the whole build.
Light a small test fire
Don’t throw a bonfire in on night one. Build a small fire — a teepee of kindling and two or three split logs — and let it burn down completely. This test run drives residual moisture out of the blocks and the base fill, and it shows you how smoke drifts across your yard before guests arrive.
Watch where the smoke goes. If it blows straight into your seating area, shift the chairs upwind of the pit now, while rearranging is still easy. Keep a garden hose or two buckets of water within reach for every fire, and never leave the pit unattended until the coals are cold.
A simple mesh spark screen over the top cuts drifting embers dramatically on breezy nights. It also keeps curious kids’ hands at a safer distance from the flames.
| If this happens | Try this |
|---|---|
| The wall leans or wobbles | The first course wasn’t level. Take the top courses off, re-level the base ring with gravel shims, and restack. |
| Smoke blows into everyone’s faces | Seat people upwind. Burn only dry, seasoned wood — wet wood smokes far more. Our guide to the seasoned firewood basics helps. |
| Water pools in the pit after rain | The gravel base is too thin or compacted. Scoop out the fill, add another inch or two of gravel, and re-tamp. |
| The fire keeps smoldering out | Airflow problem. Clear ash buildup from the base, use smaller splits, and don’t pack logs tight — fire needs oxygen gaps. |
| Blocks are cracking after a season | Flame is reaching bare block. Check that the steel ring fully lines the inside — replace any block the fire touches directly. |
Common questions
The model fire code specifies 25 feet from structures and combustibles for recreational fires, while many local fire departments accept 10 feet as a minimum. Always follow the stricter of your local rules — and keep at least 15 feet of clear space above the pit from branches or covers.
It depends entirely on where you live. Some towns require a permit and inspection; others only restrict burning during dry months. Call your local fire office before you buy materials — it takes ten minutes and avoids fines.
A basic stacked-block pit like this one typically runs $75 to $150 in materials: retaining wall blocks, a steel fire ring ($30–$60), and gravel. Fancier stone or a gas burner kit costs more.
Never burn pressure-treated or painted lumber, plywood, trash, plastics, or yard waste — they release toxic fumes and can violate fire codes. Never use gasoline or kerosene to start the fire. Burn only clean, dry firewood; see our ranking of the best firewood to burn.
Wood gives the classic crackle and costs less to build, but many cities restrict wood smoke — and gas lights instantly with no embers. If you’re leaning gas, read up on propane heater safety first; the same ventilation and leak-check habits apply.
- 36–48 wall blocks, steel ring
- Gravel, lava rock or coarse sand
- Shovel, tamper, 4-ft level
- Stake, string, tape measure
- Check permits, call 811
- 25 ft from combustibles
- Mark a 4-ft circle
- Dig 6 in. down, level
- 2 in. gravel, tamped flat
- First course dead level
- 3 more courses, staggered
- Steel ring + lava rock fill
- Small test fire first
The bottom line
You now know how to build a fire pit that will last: legal spot, solid gravel base, level courses, and a steel liner taking the heat so the blocks never do. Build it this weekend, and by next weekend you’ll wonder why you waited.
Your next move: stock it with the right fuel. Burn only dry, seasoned wood — our guide on how to dry firewood fast gets a green stack burn-ready in months, not years. Keep the hose nearby, never walk away from a lit fire, and enjoy it.