How to Put Out a Fire Pit Safely: Wood, Gas, and Smokeless Pits, Done Right
Last updated: November 6, 2026
Learning how to put out a fire pit safely matters as much as learning to light one. A fire that looks dead can still hold enough heat to start a new fire hours later, and a gas pit left with its valve open can leak fuel long after the flames are gone. This guide walks you through the full shutdown, from the last log to cold ash in a metal can, so you can walk away with a clear head.
You will learn the drown, stir, and feel method for wood fires, the valve-first shutdown for gas and propane pits, and the sand method for pits where water could cause damage. The whole process takes about 20 to 30 minutes of active work for a normal backyard fire, plus cooling time while the pit sits untouched. Plan the shutdown before you light the fire, and keep your water, sand, shovel, and metal ash can within reach from the start.
Read the safety note below before you begin. Fire, hot ash, steam, and propane each carry their own risks, and a rushed shutdown is where most backyard fire pit accidents happen.
Safety first: read this before you touch the fire
Never leave a fire pit burning or smoldering while you go inside, go to bed, or leave the house. A fire is only done when the ash feels cool to the touch across the whole surface. Ashes can hold heat for days, so treat every scoop of ash as hot until you have checked it.
Respect local burn bans and fire rules. If a burn ban is in force, do not light a fire at all. Keep children and pets at least 3 feet from the pit while it burns and while it cools. Wear closed shoes, long sleeves, and heat-safe gloves when you handle the poker, shovel, or lid.
If a fire escapes the pit, call your local emergency number right away and move people and pets clear. If you smell gas around a propane or natural gas pit, leave the area, do not light anything, and call your gas supplier or emergency services from a safe distance. This guide is general safety information, not a substitute for your fire pit manual or local fire rules. When in doubt, call a licensed professional.
TOTAL TIME
20 to 30 min active, plus cooling
ACTIVE TIME
20 to 30 minutes
DIFFICULTY
Beginner friendly
What you need
- A bucket of water, at least 2 gallons, or a garden hose with a spray nozzle set to a gentle spray
- A bucket of dry sand or dry dirt, for pits where water is not the right choice
- A long metal poker and a metal shovel with a long handle
- Heat-safe gloves and closed shoes
- A metal ash can with a tight-fitting lid, kept away from the house and anything that can burn
- A snuffer lid, spark screen, or fitted metal cover for your pit, if you have one
- A flashlight if you are shutting the pit down after dark
Keep all of this beside the pit before you light it. Walking away to fetch water while a fire burns is how small problems turn into big ones.
At a glance: the wood fire shutdown in 7 steps
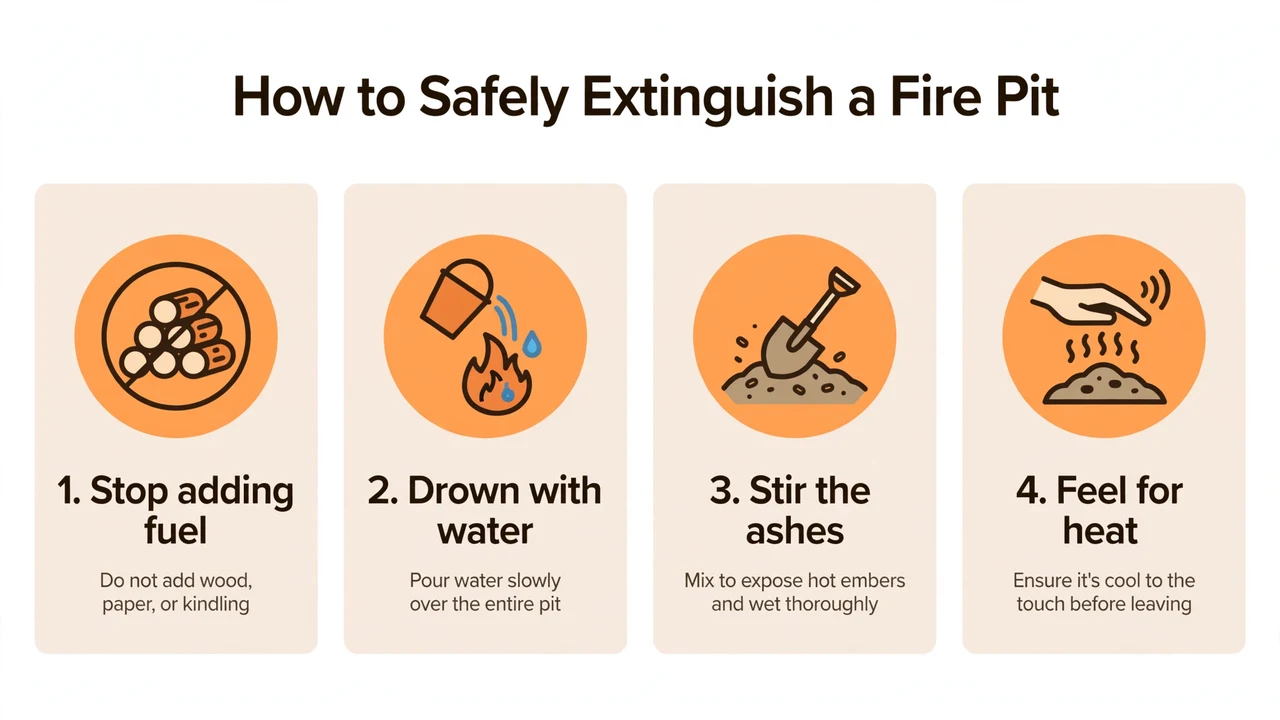
- Stop adding fuel and let the flames die down.
- Drown the coals with water, a little at a time.
- Stir the ash and embers with a metal shovel.
- Drown and stir a second time.
- Feel for heat with the back of your hand.
- Cover the pit and let it cool.
- Scoop the cold ash into a metal can.
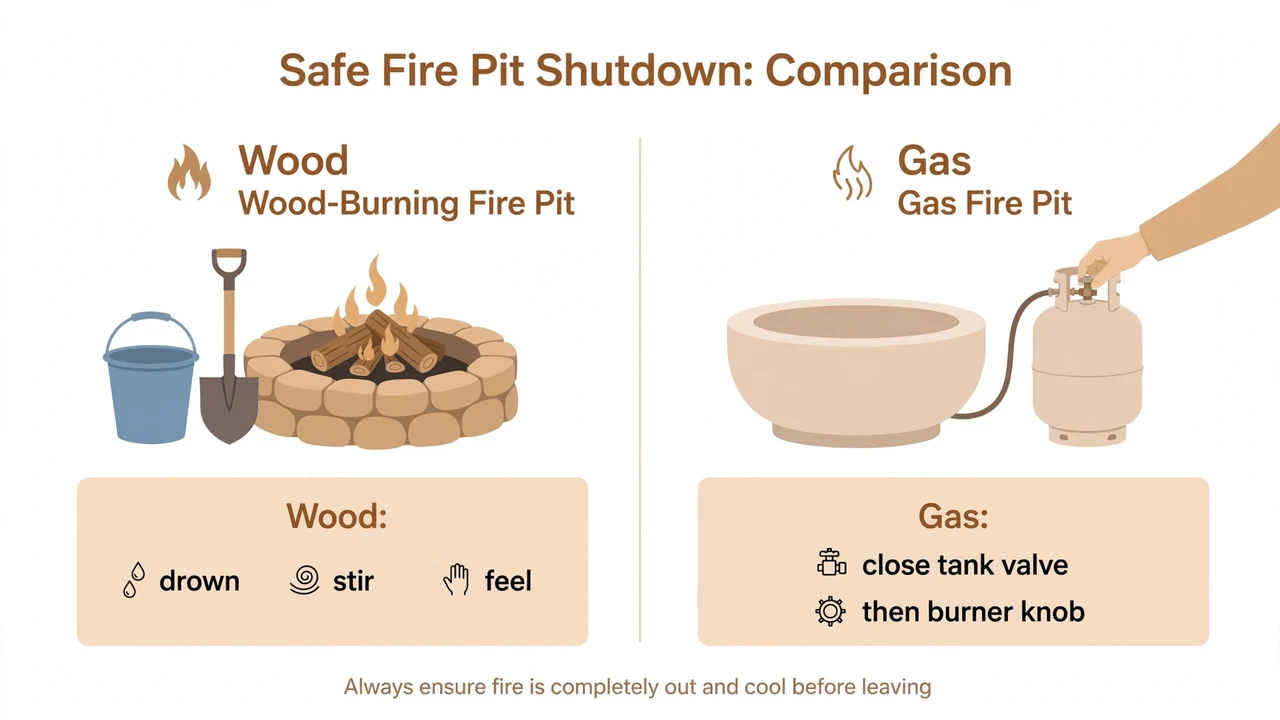
Gas and propane pits follow a different order. Close the tank valve first, then the burner knob. The gas section below covers that shutdown in full.
Start by naming your fire pit type
The right shutdown depends on what burns in your pit. Wood pits need water, stirring, and a heat check. Gas and propane pits need the fuel cut off at the source before anything else. Smokeless wood pits follow the wood method, but their double walls and narrow air channels hold heat longer, so give them more cooling time.
Check your pit manual before you use water on a stone, concrete, or cast iron bowl. A sudden splash of cold water on a very hot stone or concrete surface can crack it from thermal shock. For those pits, sand or a long burn-down with a snuffer lid is the safer path, and the sand method is covered in its own section below.
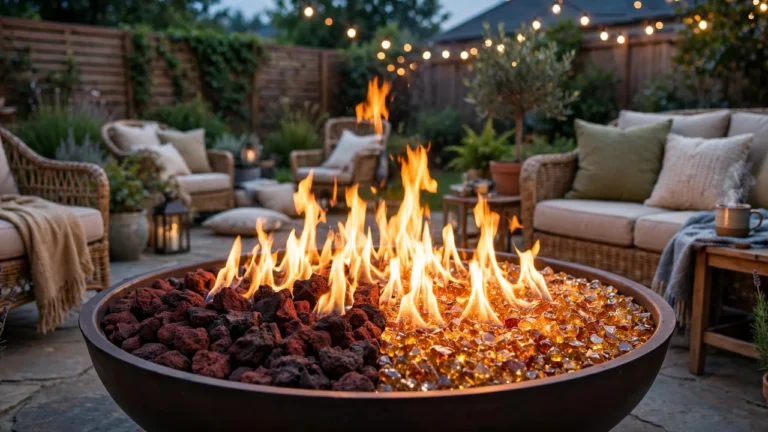
If you are unsure which type you own, look for a gas line, a propane tank, or a control knob. Any of those means you have a gas pit, even if it holds lava rock or fire glass on top. Our guide to lava rock vs fire glass for fire pits explains what sits in the burner tray and how each material handles heat.
| Shutdown method | Best for | What it does | Watch out for |
|---|---|---|---|
| Drown, stir, feel | Wood in a metal bowl | Water soaks the coals, stirring exposes hidden embers, and the hand check proves the ash is cold | Steam burns if you pour too fast; stir from the side, not from above |
| Sand smother | Stone, concrete, and cast iron pits | Dry sand cuts off oxygen without thermal shock | Works slower than water; the ash still needs a heat check |
| Snuffer lid | Metal pits with a fitted lid | The lid starves the fire of oxygen while the pit cools on its own | Lifting the lid early lets oxygen back in and can flare the fire up again |
| Valve-first shutoff | Gas and propane pits | Closing the tank valve stops the fuel supply, then the burner knob closes the line | Never reverse the order; a gas smell after shutoff means a leak check is needed |
| Burn-down only | Any wood pit when you have hours to spare | No new fuel means the fire dies to ash on its own | You still have to check the ash is cold before you leave it |
Pick your method before the fire gets low. A plan made while the flames are high is worth more than a bucket fetched in a hurry. If you host guests, tell one other adult where the water and the ash can are, so the shutdown does not depend on one person alone. Our holiday fire pit safety guide for Christmas parties has a host timeline that covers this kind of planning for a full evening.
Step 1: Stop adding fuel and let the flames die down
Stop feeding the fire at least 30 minutes before you plan to shut it down. No new logs, no kindling, no paper, and no fire starters. A smaller fire is a safer fire to put out, and a coal bed is far easier to soak than a pile of burning logs.
Spread the burning logs apart with your poker so air can reach each piece and the flames burn down fast. Keep the spark screen on while the fire settles. This is also the moment to move chairs, cushions, and anything flammable a step farther back, so you have clear space to work around the pit.
Step 2: Drown the coals with water, a little at a time
Pour water slowly over the coals, starting at the outer edge and working toward the center. A gentle spray from a hose works well. A slow pour from a bucket works well too. What you want to avoid is a single big dump of water onto a hot coal bed, which throws up a cloud of steam and can splash hot ash.
Listen for the hiss. Keep pouring until the hissing fades and no flame or orange glow shows anywhere on the surface.
For a normal backyard fire, that first pass takes about 1 to 2 gallons of water. A bigger fire needs more, and that is fine. Water is cheap, and a half-soaked fire is not out.
Heads up: stand to the side of the pit, not over it, when you pour. Steam rises straight up and can burn your hands and face. Wear your gloves, keep your face back, and pour from arm’s length. If the pit is stone or concrete and still very hot, skip water and use the sand method below instead.
Step 3: Stir the ash and embers with a metal shovel
Water alone does not reach the embers packed under the ash. Push your shovel into the ash bed and turn it over, section by section, so the wet top layer mixes with the dry heat underneath. Break apart any half-burned logs and roll them so their hot cores face up.
Watch for fresh orange glow as you stir. Every glowing spot is an ember that was hiding under the ash, and each one needs water.
This is the step most people skip, and it is the reason fires that looked out can come back hours later. Take your time here. A thorough stir takes a few minutes, and those minutes are the whole job.
Step 4: Drown and stir a second time
Pour a second round of water over the stirred ash, then stir again. The second pass catches the embers the first stir exposed. Keep going until the ash is wet through, no smoke rises, and no glow appears when you turn the ash over.
If smoke keeps rising after two full rounds, the fire is bigger than it looks. Add more water, stir again, and give it a few minutes before you check. Do not cover the pit while it still smokes, since a cover traps heat and hides the problem instead of fixing it.
Step 5: Feel for heat with the back of your hand
Hold the back of your bare hand about 6 inches above the ash and move it slowly across the whole surface. The back of the hand is more sensitive to heat than the palm, and holding it above the ash keeps you clear of any last hot spot. Any warmth at all means the fire is not out.
When no heat reaches your hand anywhere, touch the ash lightly with your fingertips. Only when the ash feels cool to the touch, all the way across, can you call the fire out.
This is the same drown, stir, and feel check the U.S. Forest Service teaches for campfires, and it works the same way in a backyard pit. If any spot still feels warm, go back to Step 4 and repeat the water and stir until the check comes back cold.
Pro tip: check the edges and the center, not the middle alone. Embers hide along the rim of the bowl, under the lip of a stone ring, and beneath half-burned logs. Run your hand check over the full surface in a slow grid, and check the outside of a metal bowl with a light touch too, since the metal stays hot after the ash cools.
Step 6: Cover the pit and let it cool
Once the ash is cold to the touch, set the spark screen, snuffer lid, or fitted cover in place. A cover keeps wind from stirring up fine ash, keeps rain from turning the ash into a soggy mess, and stops pets and children from reaching into the pit. It is a finishing step, not a substitute for the water and stir work you already did.
Leave the cover on while the pit cools the rest of the way. A metal bowl can stay warm to the touch for a while after the ash inside is cold, and a stone ring holds heat even longer. Give the pit time, and do not move it, store it, or stack anything on it until the whole thing feels cool.
Step 7: Scoop the cold ash into a metal can
Scoop the cold ash into a metal can with a tight-fitting lid, using your metal shovel. Do not use a plastic bucket, a cardboard box, or a paper bag. Ash can hold heat for days, and the U.S. Fire Administration warns that ashes should go into a metal container with a lid, kept away from the house and anything that can burn.
Some fire departments warn that ashes can take up to 72 hours to cool completely. That is why the can matters even when the ash felt cold in the pit.
Store the sealed can outside, at least 10 feet from the house, fences, and firewood, until you are sure the ash is cold. Only then should you dispose of it under your local rules. Never dump ash straight into a trash can, and never dump it on a lawn, in a garden bed, or near dry leaves while it might still hold heat.
Shut down a gas or propane fire pit the right way
Gas pits shut down in the opposite order from wood pits. Water is not part of the job at all. The fuel supply is the fire, so cutting the fuel off is the shutdown. Get the order wrong and gas can sit in the line after the flames die, which is a leak risk you do not want.
Follow these steps in order, every time:
- Close the propane tank valve. Turn it clockwise until it stops. This cuts the fuel supply at the source, and the flames will die as the last gas in the line burns off.
- Turn the burner control knob to the off position. On most pits this is the knob on the side of the unit.
- Wait a few minutes, then check for a gas smell. A faint smell right at the burner as the last gas clears is normal for a moment. A strong smell, or a smell that lingers, is not. If it lingers, leave the area and call your gas supplier.
- Let the burner tray, lava rock, or fire glass cool. The burner parts stay hot after the flames go out. Do not touch them, and do not cover the pit until they feel cool.
- Disconnect the tank only if you plan to store it. Store propane tanks upright, outdoors, and away from heat. Never store a propane tank indoors, in a garage, or in a shed.
Our guide on how to light a gas fire pit covers the startup order. Startup opens the fuel first and lights it last; shutdown closes the fuel first and the controls last, so the line never holds gas you forgot about. If your pit runs on a fixed natural gas line instead of a tank, close the burner knob and then the gas shutoff valve for the line, and call a licensed gas fitter if the valve is stiff, damaged, or hard to reach.
Heads up: never use water to put out a gas fire pit, and never pour water on the burner tray to cool it faster. Water in the burner can damage the ignition parts and leave the pit unreliable the next time you light it. Let the parts cool in the air, and keep the cover off until they do.
What changes for a smokeless fire pit
Smokeless pits burn wood, so the drown, stir, and feel method still applies. Two things change. First, the double wall and the air channels inside the pit hold heat longer than a simple bowl, so the cooling time is longer. Second, the narrow base and the ash pan at the bottom trap fine ash where your shovel cannot reach it well.
Let the fire burn down to a low coal bed, then drown and stir as above. Lift the ash pan out with gloves once the ash is cold, and empty it into your metal ash can.
Run the hand check over the inner wall as well as the ash, since the steel can stay hot after the ash cools. Do not tip a smokeless pit on its side to empty it while it is still warm. The trapped heat can flare the ash back up when air hits it.
When water is the wrong choice
Water is the fastest way to put out a wood fire, but it is not right for every pit. Stone and concrete bowls can crack when cold water hits a very hot surface. Uncoated cast iron can crack or warp the same way. A tabletop pit on a wooden deck is another case where a bucket of water can cause more harm than the fire did, by soaking the deck and splashing hot ash onto it.
For those pits, use dry sand instead. Scoop sand over the whole coal bed from the outside in, until no glow shows. Press the sand down lightly with the back of the shovel so it makes contact with the coals.
Leave the sand in place for at least 30 minutes without lifting it to peek. Lifting it early lets oxygen back in and can flare the fire up again. After the wait, stir the sand and ash together, feel for heat with the back of your hand, and add more sand if any warmth remains.
If your pit is an in-ground stone ring, the same rule holds. Sand and time beat water and a cracked ring. Our guide to how to build an in-ground fire pit covers the stone and drainage choices that make a ring hold up to heat season after season.
What never to do when you put out a fire pit
Most fire pit accidents come from a shortcut that felt harmless at the time. Keep this list in mind, and share it with anyone who uses the pit.
- Never leave a fire to burn itself out while you go inside. A fire that looks quiet can flare up with a gust of wind, and embers can travel farther than you think.
- Never pour gasoline, lighter fluid, or any liquid fuel on a fire to restart it or to put it out. Liquid fuel can flash and cause severe burns.
- Never dump a bucket of water on a very hot stone, concrete, or cast iron pit. Thermal shock can crack the bowl. Use sand and time instead.
- Never pour water on a grease fire. If cooking fat caught fire in the pit, smother it with sand or a metal lid. Water spreads burning grease.
- Never move a fire pit while it is still hot. Hot metal burns on contact, and a tipped pit spills live embers across the ground.
- Never put ash in a plastic container, a paper bag, or a trash can. Ash can hold heat for days. Metal can with a lid, stored outside, every time.
- Never use a fire pit indoors, in a garage, or under a covered porch. Fire pits belong outdoors, at least 10 feet from the house and anything that can burn. Our guide on can you use a fire pit indoors explains the carbon monoxide risk in full.
- Never trust how the ash looks. Grey ash can hide a hot core. Feel for heat, do not eyeball it.
How long before it is safe to walk away
There is no single clock time that fits every fire, because a big fire holds more heat than a small one. What you can trust is a sequence of checks, not a timer. Use this table as your guide, and do not skip a row.
| Stage | What you see | What it means | What to do |
|---|---|---|---|
| Flames out | No flame, grey ash on top | The surface looks dead, but embers may still burn underneath | Drown and stir, then check again |
| No smoke, no glow | No smoke rises when you stir | The fire is likely out, but heat can still hide in the ash | Run the back-of-hand check across the full surface |
| Cool to the touch | Ash feels cool, bowl feels cool | The fire is out and the pit is safe to cover | Cover the pit, and you can go inside |
| Ash stored cold | Ash sits in a sealed metal can outside | Ash can still hold heat for days, even after it felt cold | Keep the can outside, away from the house, until disposal |
Wind changes the math. On a windy night, embers stay hot longer and can travel, so check twice and keep the spark screen on until the ash is cold.
On a calm night, the fire dies down faster, but the hand check is still the test that counts. A clock cannot tell you a fire is out. Your hand can.
If you are building or buying a pit and want a shutdown that is easier from day one, look for a model with a fitted snuffer lid and a removable ash pan. Our guide to DIY fire pit kits, and whether they are worth it, covers which kit features help with cleaning and shutdown and which ones get in the way.
| If this happens | Try this |
|---|---|
| The fire keeps smoking after two rounds of water | Add more water, stir deeper, and break apart half-burned logs. A log core can smolder long after the outside looks wet. |
| Steam burns your hands when you pour | Pour slower, from the side, with gloves on. Use a gentle hose spray instead of a bucket dump. |
| The ash still feels warm after stirring | Repeat the drown and stir until the hand check comes back cold. Do not cover the pit yet. |
| The fire flares up when you lift the lid | Set the lid back down, wait longer, and use water or sand before you lift it again. Oxygen feeds the flare. |
| You smell gas after shutting off a propane pit | Leave the area, do not light anything, and call your gas supplier or emergency services from a safe distance. Do not try to find the leak yourself. |
| Water cracks or chips the pit surface | Stop using water on that pit. Switch to the sand method and the burn-down method, and check the manual for the maker’s guidance. |
Frequently asked questions
How do you put out a fire pit safely?
Stop adding fuel, let the flames die down, then drown the coals with water a little at a time. Stir the ash with a metal shovel, drown and stir a second time, then feel for heat with the back of your hand held 6 inches above the ash. Only walk away when the ash feels cool across the whole surface.
Can I leave a fire pit to burn out on its own?
No. Never leave a fire pit burning or smoldering while you go inside, go to bed, or leave the house. A fire that looks quiet can flare up with a gust of wind, and embers can stay hot for hours. Put the fire out with water or sand, check it is cold, and then leave it.
How long do fire pit ashes stay hot?
Ashes can hold heat for days. Some fire departments warn that ashes can take up to 72 hours to cool completely. Always store ash in a metal can with a tight-fitting lid, kept outside and at least 10 feet from the house, until you are sure it is cold.
Should I pour water on a fire pit?
Water works well for a wood fire in a metal bowl, poured slowly from the side and followed by stirring. Do not pour water on a very hot stone, concrete, or cast iron pit, since thermal shock can crack it. Use dry sand for those pits, and never pour water on a gas fire pit or a grease fire.
How do you put out a gas fire pit?
Close the propane tank valve first, then turn the burner control knob off. Wait a few minutes and check for a gas smell. Let the burner tray and fire glass cool in the air, and do not cover the pit until the parts feel cool. If you smell gas after shutoff, leave the area and call your gas supplier.
Can I use sand to put out a fire pit?
Yes. Dry sand is a good choice for stone, concrete, and cast iron pits, and for any pit where water could cause damage. Scoop sand over the whole coal bed, press it down lightly, and leave it for at least 30 minutes. Then stir, feel for heat, and add more sand if any warmth remains.
How do I know the fire is really out?
The fire is out when no smoke rises as you stir, no glow shows in the ash, and the ash feels cool to the touch across the whole surface. Hold the back of your hand 6 inches above the ash first, then touch the ash lightly. If any spot feels warm, the fire is not out yet.
Where should I put fire pit ash after it cools?
Put cold ash in a metal can with a tight-fitting lid and store the can outside, at least 10 feet from the house, fences, and firewood. Never use a plastic container or a trash can. Dispose of the ash under your local rules only after you are sure it is fully cold.
Quick reference card: put out a fire pit safely
You need: water (2 gallons or a hose), dry sand, long poker, metal shovel, gloves, metal ash can with lid, snuffer lid or cover.
Gas:
1) Tank valve closed
2) Burner knob off
3) Check for a gas smell
4) Let parts cool in the air
Wood:
1) Stop adding fuel
2) Drown the coals slowly
3) Stir the ash
4) Drown and stir again
5) Feel for heat with the back of your hand
6) Cover and let it cool
7) Scoop cold ash into a metal can
Remember: ash can stay hot for days. Metal can with a lid, stored outside, at least 10 feet from the house.
That is how to put out a fire pit safely, from the last log to a cold ash can. You stopped the fuel, soaked and stirred the coals, felt for heat with your own hand, and stored the ash where it cannot start a new fire. The pit is covered, the yard is quiet, and you can head inside without a second thought.
Next time you light the pit, set up the shutdown first. Put the water, sand, shovel, and ash can beside the pit before the first match. A fire that starts with its ending planned is a fire that ends well.
Sources
U.S. Fire Administration, Outdoor Fire Safety: fire pits should sit at least 10 feet from the home and anything that can burn, with a metal screen over wood-burning fires. usfa.dhs.gov/prevention/outdoor-fires/
U.S. Forest Service campfire guidance: drown the fire with water, stir the ashes and embers, and feel for heat before leaving.
City of Madison Fire Department: ashes from fireplaces and fire pits can take up to 72 hours to cool completely, and should go in a metal container with a lid stored away from buildings and fences. cityofmadison.com/fire daily report
National Fire Protection Association: keep fire pits at least 10 feet from anything that can burn, and use fire pits outdoors only.