How to Convert a Wood Burning Fireplace to Electric (Without Tearing Up Your House)?
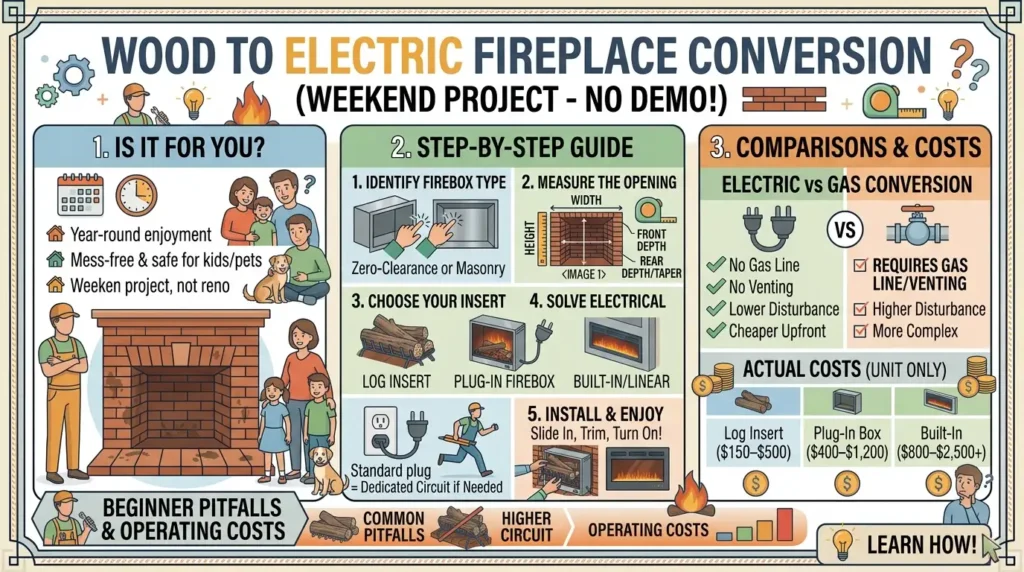
When your wood burning fireplace is not in use most of the year too much trouble, too messy, or even too unsafe with kids and pets around – you need not gutted or bricked up. You can make it electric, and, on most houses, it is a weekend project, not a renovation.
This guide will step-by-step show how that is done: what type of firebox you are dealing with, what measurements are important, which insert will fit, working with the electrical side, and what pitfalls make most beginners fall into. It also decomposes the actual costs and compares the electric conversion to the gas conversion route, as many homeowners begin with the question of gas before they learn that the same problem can be solved with much less disturbance by using electric.
What Does “Converting” a Wood Fireplace to Electric Actually Mean?
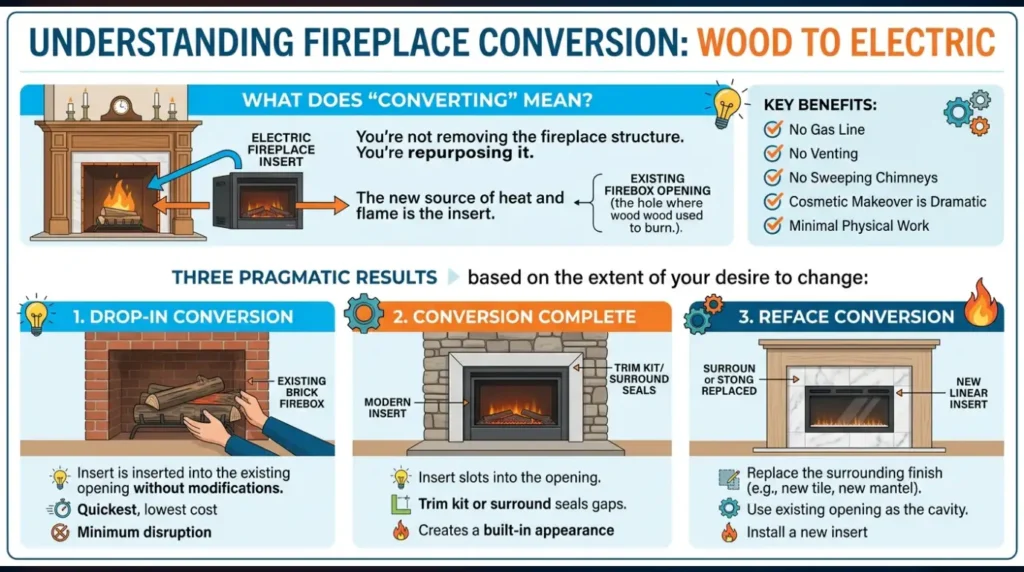
To turn a wood burning fireplace into an electric fireplace, place an electric fireplace insert into your existing firebox opening – the hole in the masonry or metal where the wood used to burn. You’re not removing the fireplace structure. You’re repurposing it.
The new source of heat and flame is the insert. No gas line. No venting. None of your sweep chimneys on your yearly list. The brick, stone or metal surround that is in place tends to remain just where it is and this is part of what makes this such a popular upgrade, the cosmetic makeover is dramatic, but the physical work is minimal.
There are three pragmatic results, based on the extent of your desire to change:
- Drop-in conversion: Insert is inserted into the existing opening without any modifications. Quickest, lowest cost, minimum disruption.
- Conversion complete: Insert slots into the opening, along with a trim kit or surround seals any gaps to a built-in appearance.
- Reface conversion: You replace the surrounding finish (new tile, new mantel, new linear insert) but leave the existing opening as the cavity.
Step 1 — Figure Out What Kind of Fireplace You Have
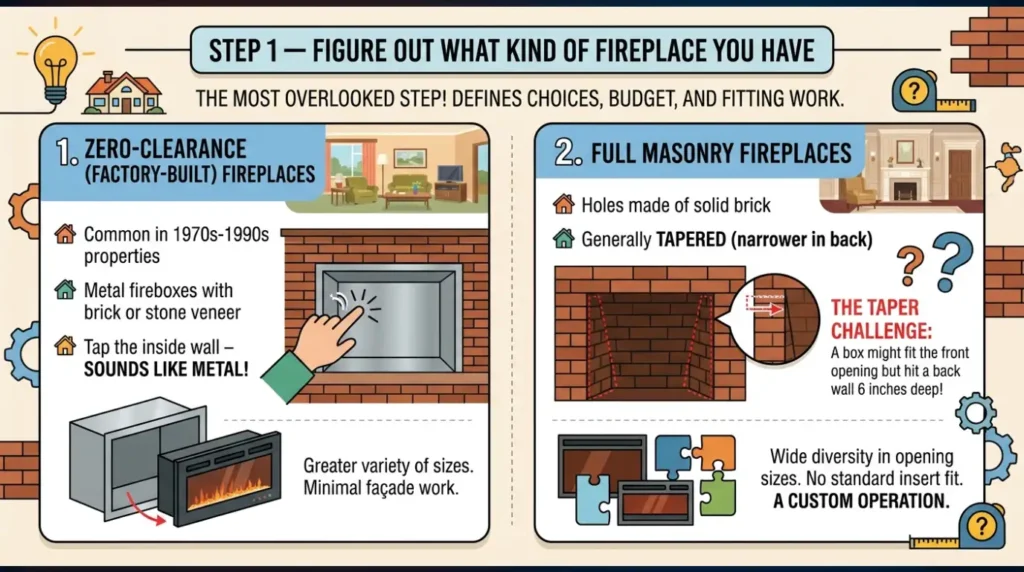
It is the almost all-overlooked step of any online guide and the one that defines all the other factors, namely, your choices, your budget, and the extent of fitting work.
Zero-Clearance (Factory-Built) Fireplaces
They were found in domestic properties constructed between the 1970s and 1990s, and are metal fireboxes with a brick or stone veneer instead of being a masonry construction. Knock at the inside wall–do you hear it sound like metal, then you have your answer. The good news: these metal boxes can be installed nearly always without spoiling the surrounding façade and this gives you a greater variety of sizes of inserts because you are not confined by an odd-shaped masonry.
Full Masonry Fireplaces
These holes are made of brick, and are generally tapered, being narrower behind than in front. The part that creates the greatest sizing errors is that taper. A hole can be made that fits into the opening on the front side but still strike a wall 6 inches away. Due to the wide diversity in masonry opening sizes, house to house, no standard size of insert is guaranteed to fit; each masonry conversion is truly a custom operation.
Step 2 — Measure the Opening Correctly
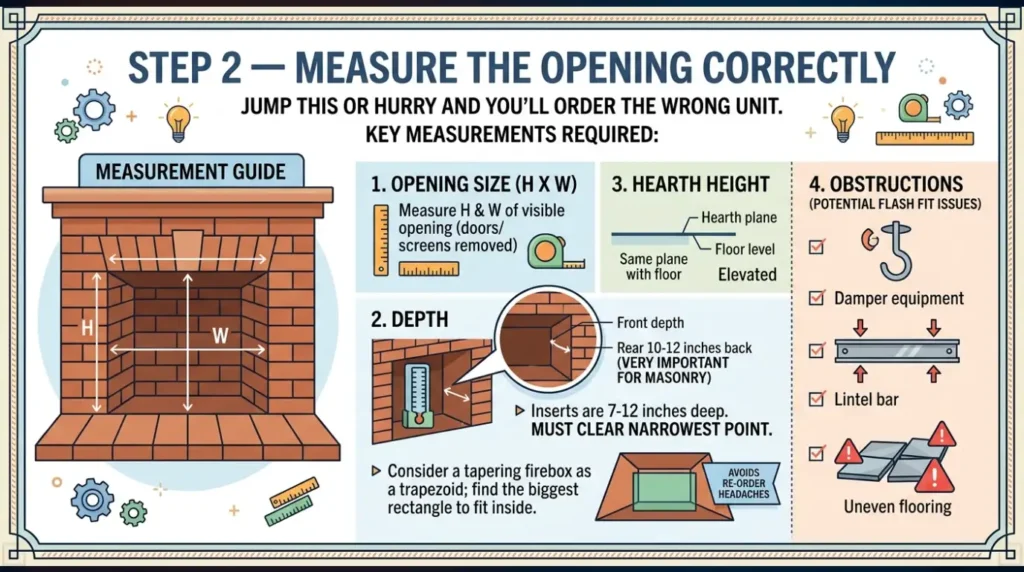
Jump this or hurry and you will be ordering the wrong unit. The following are what really need measurement:
- Height and width of the opening to be seen with any doors or mesh screens taken down or pushed aside.
- Dent in the front of the opening.
- In rear 10-12 inches back of the front – important in masonry openings, as electric inserts measure about 7-12 inches deep, and must be able to clear the narrowest opening through which they will pass.
- Hearth height – in the same plane with the floor, or elevated?
- Obstructions – damper equipment, a lintel bar, or uneven flooring that may obstruct a flush fit.
Consider a tapering masonry firebox as a trapezoid and all the inserts as rectangles: you are trying to find the biggest rectangle that can be placed inside that trapezoid. That is one thing that avoids most of the headaches of re-order.
Step 3 — Choose the Right Type of Electric Insert
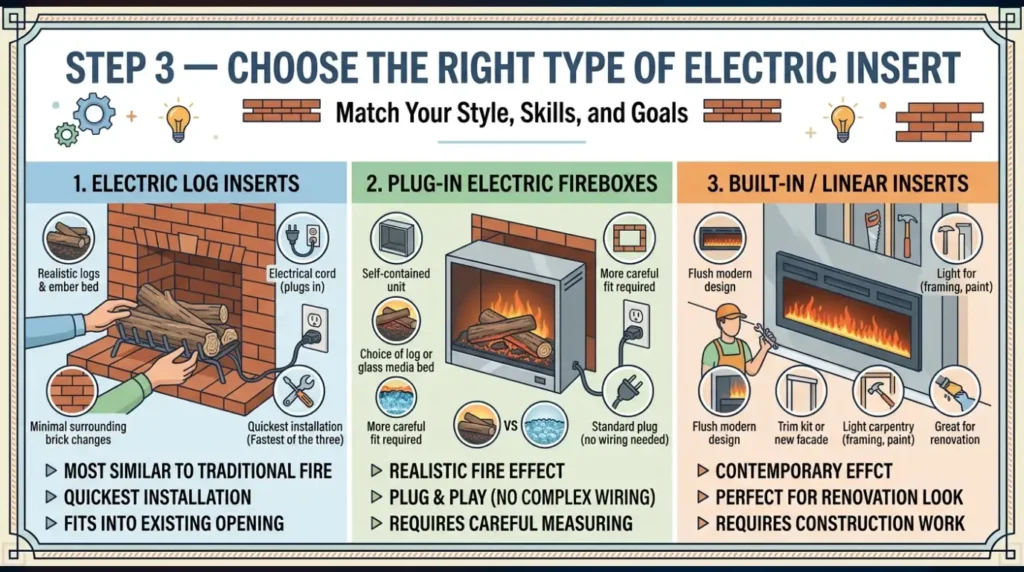
Electric Log Inserts
These incorporate composite logs, an ember bed, and an electrical cord – occasionally placed on a small grate. They do fit into the hole that is already in place and fit. The surrounding brick does not alter anything, and this is the most similar to a traditional wood fire and it is the quickest of the three to install.
Plug-In Electric Fireboxes
A notch higher in customization: a box with its front, with realistic logs or a modernized media bed of glass or stone. The latter usually require a somewhat more cautious fit than a log insert and yet do not require any wiring except a standard plug.
Built-In / Linear Inserts (for a Renovation Look)
Even when you are replacing the fireplace completely (i.e., a conventional brick surround with a flush linear one) installed with a built-in insert and a trim kit or new facade provides a contemporary effect. This path typically combines conversion with light carpentry: framing, trim, and paint.
Comparison Table
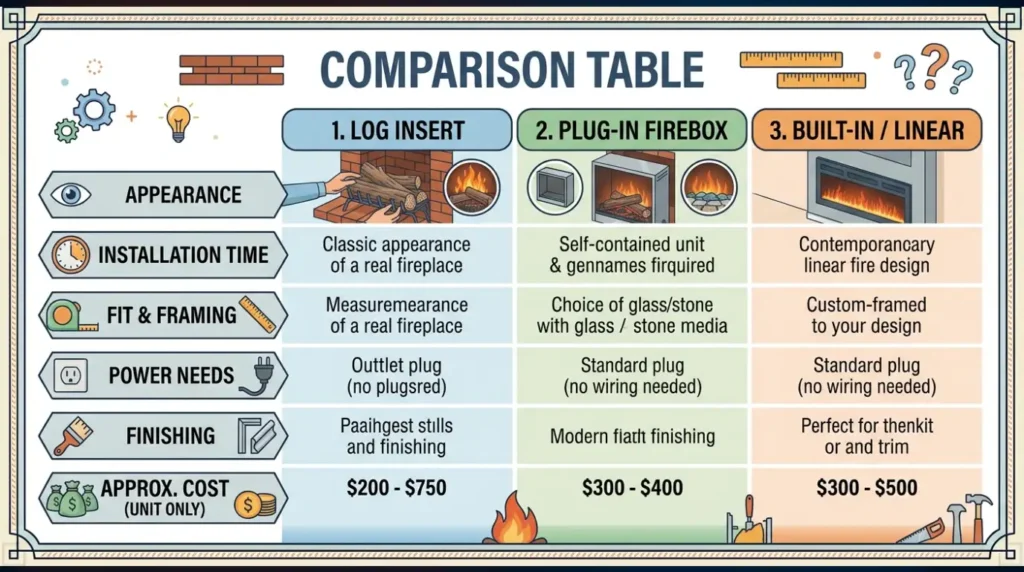
| Feature | Log Insert | Plug-In Firebox | Built-In / Linear |
| Appearance | Classic appearance of a real fireplace | Built-in appearance, greater design flexibility | Complete modern remodeling |
| Installation Time | 15 to 45 minutes | 45 to 120 minutes | Half day to a full day (with framing/trim) |
| Fit & Framing | Slides into available opening | Has to fit opening + depth | Custom-framed to your design |
| Power Needs | Standard outlet | Standard outlet (some models) | Standard outlet or dedicated circuit |
| Finishing | Minimal finishing required | Trim kit/surround frequently enhances fit | Trim, paint, new facade |
| Approx. Cost (Unit Only) | $150–$500 | $400–$1,200 | $800–$2,500+ |
Step 4 — Sort Out the Electrical Requirements
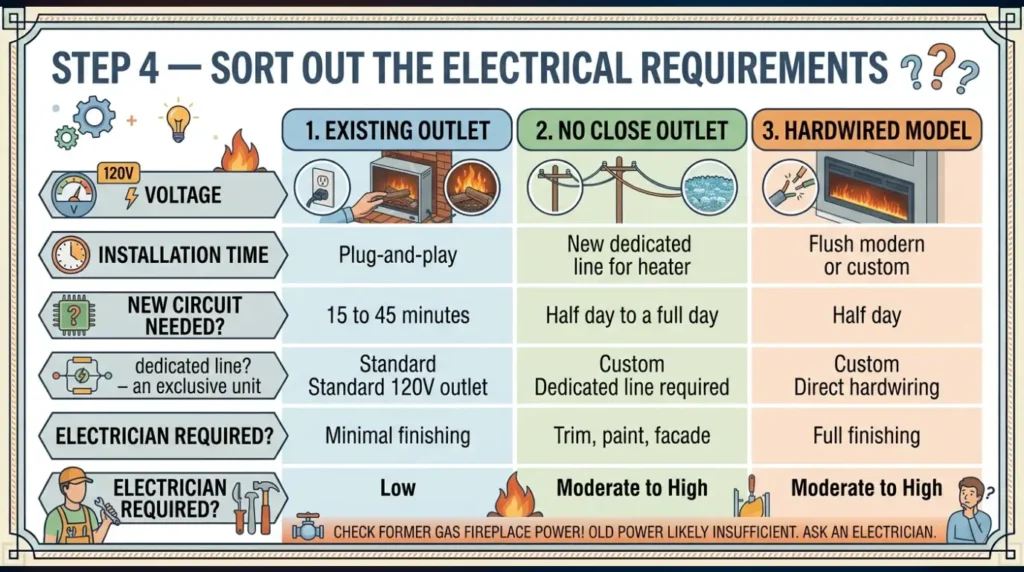
The majority of electric inserts will operate on a typical 120-volt household current, and with an outlet already close to the firebox (not uncommon in homes with a history of gas inserts) you might not require an electrician at all.
When there is no outlet in close you have two ways to go: you can get a licensed electrician to run a new line, or you can find a model that can be hardwired directly. Larger units, particularly 240-volt units with greater heat production, need to be on their own dedicated circuit and not share a line with other household units. A full-rated fireplace heater can draw the entire load of a typical circuit, thus connecting it to an already-loaded line will cause breakers to trip at best.
One fact to check when converting a former gas fireplace: any existing power supply that was left behind was almost certainly just enough to power the burner and create some kind of blower – not a full circuit that could serve a full electric heater. Before making assumptions that it is plug-and-play, have an electrician check it out.
Step 5 — Prep the Firebox
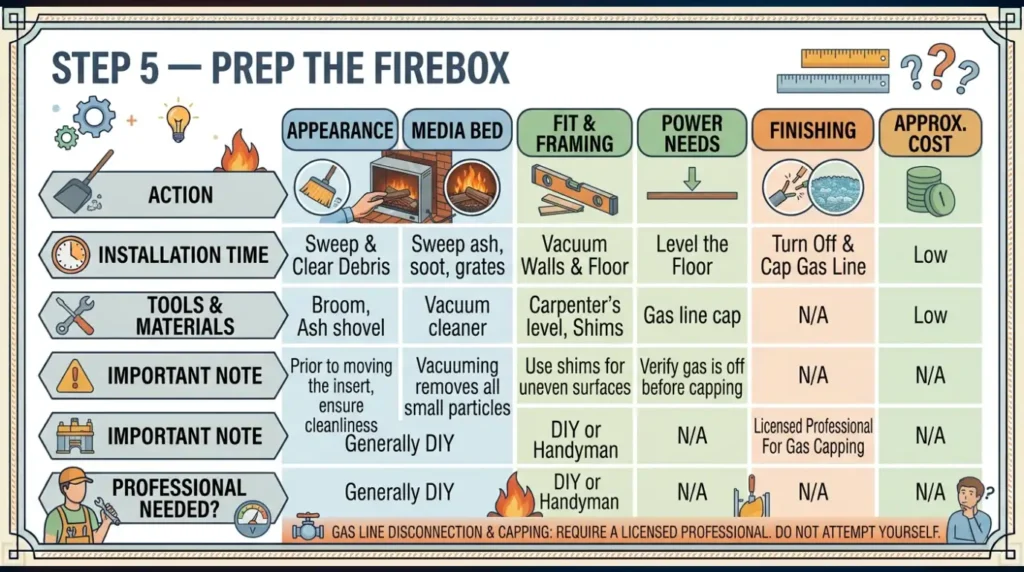
Prior to the insert being moved in any direction relative to the opening:
- Sweep ash, soot and any remaining grates or debris.
- Vacuum firebox walls and floor.
- Make sure the floor is in level- shims are cheap insurance when it is not.
- When changing to gas, make sure that the gas line is turned off and covered with a licensed professional before proceeding to do anything.
Step 6 — Install the Insert? How to Convert a Wood Burning Fireplace to Electric?
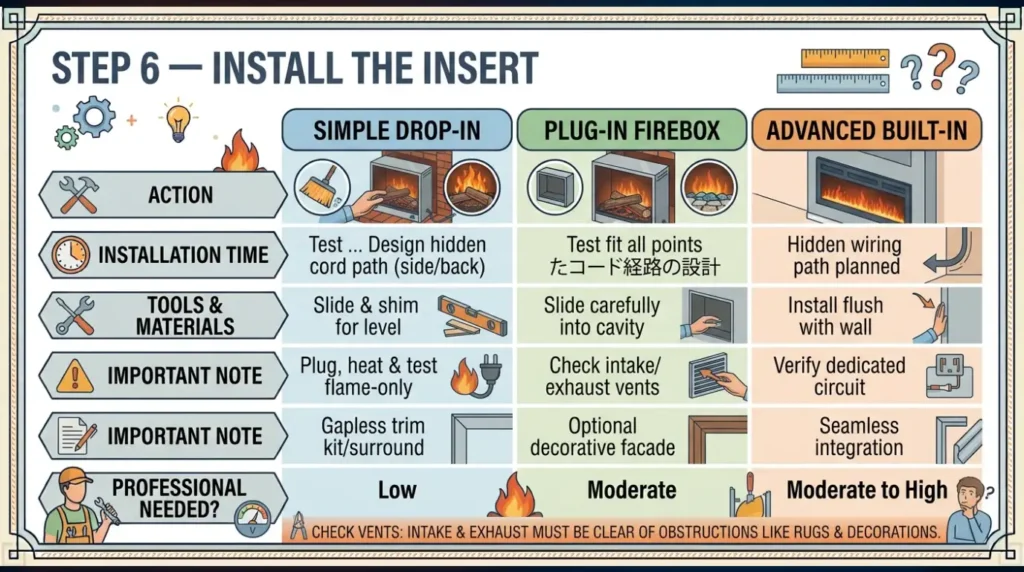
To drop into a job and have a simple one:
- Before the final placement, test fit the unit to ensure that it clears the depth at all points.
- Design the exit route of the cord in such a way that it is out of sight and not pinched – the side, back or down through the fire are popular choices.
- Slide the insert in, adjusting and shimming as necessary.
- Select a trim kit or surround to create built in, gapless look.
- Heat, first plug and test flame-only mode.
- Check that there is no obstruction to the intake or exhaust vents of the unit by rugs, decoration, tight trim, and so forth.
What Does It Cost to Convert a Wood Fireplace to Electric?
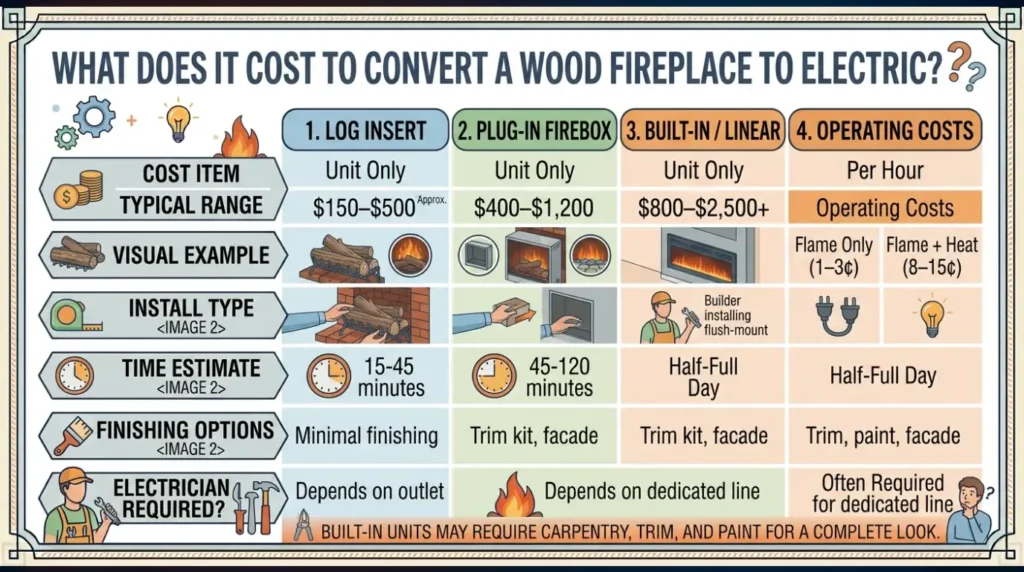
| Cost Item | Typical Range |
| Log insert (unit only) | $150–$500 |
| Plug-in firebox (unit only) | $400–$1,200 |
| Built-in/linear insert (unit only) | $800–$2,500+ |
| Trim kit or surround | $50–$300 |
| Electrician (new outlet or dedicated circuit) | $150–$600 |
| Operating cost — flame only | Roughly 1–3 cents per hour |
| Operating cost — flame + heat | Roughly 8–15 cents per hour |
The prices depend on the type of insert, size and the type of electrician or finish carpenter you need. Being an approximate planning range:
That is against a gas conversion which normally needs a licensed gas line installation, a compatible venting system and a professional inspection prior to the unit ever being usable work that normally costs in the thousands and may take days or weeks depending on trade schedules.
Electric vs. Gas Conversion: Which Makes More Sense?
The two begin with the same query. I want a fire without the wood but soon the trail’s part.
Gas conversion refers to a licensed gas line installed to the fireplace (where there is not one) a compatible vent system, and prior inspection. Ventless gas inserts may be sold as a shorthack, but they vent their combustion byproducts into the room and are prohibited or limited in bedrooms and some other living areas in most jurisdictions – so that what seems simple is really a local-code check you must rely on.
Electric conversion does not do any of that. No gas line, no venting, no combustion to check, no creosote accumulation to check. The trade-off is real and not a thing to be ashamed of gas can create radiant heat which some homeowners will feel far better about as a way of warming a large, open room and that is a valid point to consider provided that the whole-room heating performance is the first thing that matters to you. However, in warmer weather, when convenience, clean installation and flame-only ambiance are the key considerations, electric is the easier, quicker and less expensive way to go.
How Realistic Does an Electric Fireplace Actually Look?
This is the fair question that skeptics pose and the true answer is: it depends on the unit. Budget log inserts appear good at a distance but appear flat when you get close. Much higher-quality inserts based on the multi-layer LED flame technology, depth-enhancing back panels, and hand-painted logs bridge that divide, some even with crackling sound effects.
When your highest consideration is reality, water vapor fireplaces take it one step further, with ultrasonic mist and LED light effects to produce a flame that has true depth and motion and is hard to tell the difference between the real fire and a water vapor fireplace at regular viewing range. They do need the proper enclosure and airflow configuration to work, and thus that is a situation when it is the install instructions of the manufacturer that take precedence over the norm.
7 Common Mistakes People Make During Conversion
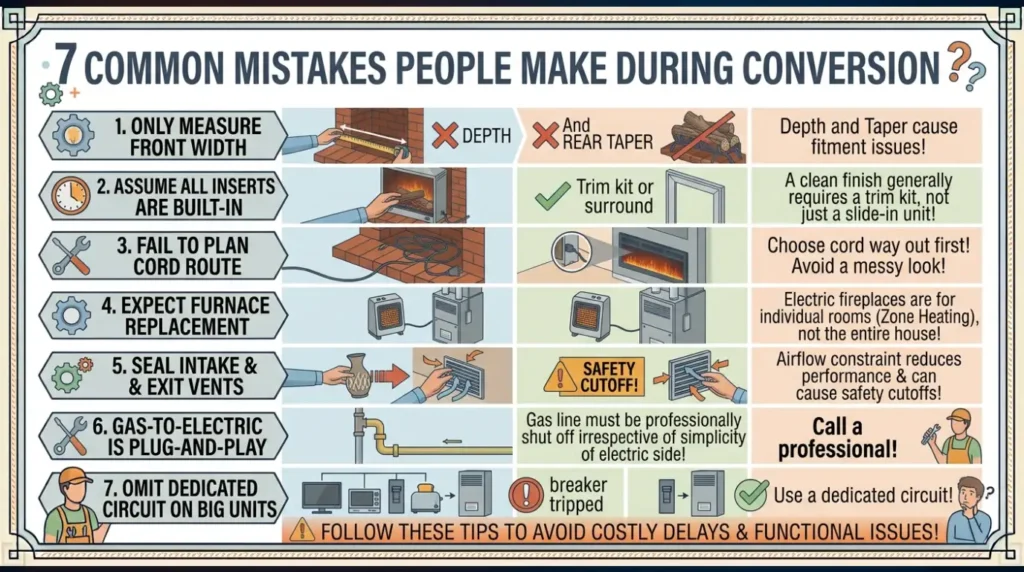
- Measuring the width of the front opening only. It is the depth and rear taper that are actually the cause of problems in fitment.
- Any insert that seems to be built-in, by default. A clean finish will generally require a trim kit or surround, not a slide-in unit.
- Failure to plan out the cord route prior to installation. An apparent ropewalk undermines the entire upgrade – choose the way out first.
- Looking forward to zone heating a single room at once, not furnace replacement. Electric fireplaces are particularly effective at heating individual rooms, not entire houses.
- Sealing the intake or exit vents using decor or tight trimming. Airflow constraints are detrimental to performance and may cause safety cutoffs.
- Considering a gas-to-electric swap to be plug-and-play. The gas line must be properly professionally shut off irrespective of the simplicity of the electric side.
- Omitting the dedicated-circuit question on bigger units. Tripping of breakers in the future is most often due to sharing a circuit with other high-draw appliances.
Conversion Checklist
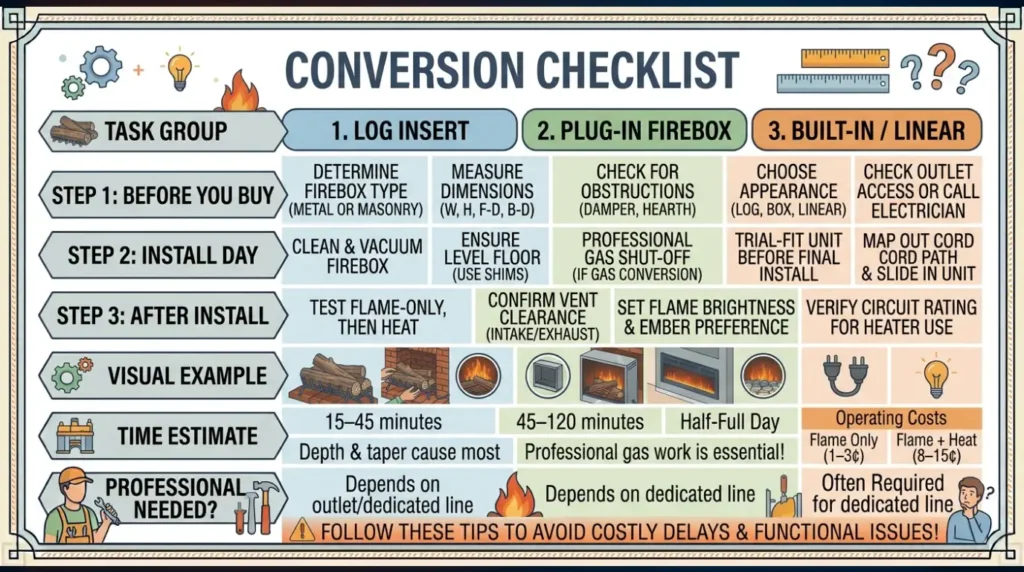
Before you buy
- Determine type of firebox: non clearance metal or complete masonry.
- Measure width, height, front depth, back depth (10 -12 inches back)
- Be aware of obstructions: damper equipment, raised hearth, uneven floor.
- Choose appearance: traditional log insert or firebox or linear/built-in.
- Check access to outlets, or make arrangements with an electrician.
Install day
- Clean and vacuum firebox.
- Check floor is in place; shims prepared.
- In case of gas conversions, make sure that the gas line is professionally shut beforehand.
- Trial-fit prior to installation.
- Pre-plan and map out the cord and then slide the unit in.
After install
- Flame-only, then heat.
- Confirm intake/exhaust clearance
- Set flame brightness and ember settings to preference
- Assure heavy frequent use of a heater on a circuit with the right rating.
You May Also Read:
FAQs:
Can it be converted to electric a burning wood fireplace?
Yes, A majority of house owners incorporate a log insert or plug-in firebox which simply fits into the existing opening, and no structural modifications are necessary.
Are electric fireplace inserts vented?
No, there are no combustion byproducts as with wood or gas units, and therefore no chimney venting is necessary.
What is the approximate cost of changing a wood fireplace into electric?
The cost of a unit can be as low as $150 to install a simple log insert, up to $2,500 or more to install a high-quality built-in linear model and may also require new electrical installation at a cost of $150 to $600.
Is a special electrical circuit required?
It is frequently not necessary to smaller flame-only or low-wattage devices, but larger heaters – particularly 240-volt units – should be on a separate circuit to prevent overloading a shared circuit.
Can I have the flame effect but not the heat?
Yes, the majority of electric inserts have a flame-only setting, and that is why the operating costs remain low in summer.
Will an electric fireplace warm my entire house?
No. These units are not meant to substitute central heating, but to heat one room.
Why is it better to convert to gas or electric?
Gas is in need of a licensed gas line, compatible venting, and inspection. Electric needs none of that – just an appropriate insert and in some instances, an electrical outlet.
What size insert will fit my fireplace?
Take the width and height of the opening, the depth at the front and about 1012 inches at the back, as masonry openings will tend to narrow at the back.
Should a water vapor fireplace be considered as an additional expense?
Yes, in case flame realism is what you are after, it is as close to real fire as you can get with no combustion. It requires proper enclosure and airflow installation.
Key Takeaways
- It is not a renovation but a repurposing project to convert a wood fireplace to electric – the existing aperture becomes the home to the insert.
- This will depend on whether you have a zero-clearance metal firebox or a full masonry opening, which will dictate your available size choices.
- It is important to measure the rear depth as much as the front width, particularly in tapered masonry openings.
- Electric avoids the gas line, venting, and inspection requirements which make gas conversion much more complex.
- Prices can be as low as less than 200 to install a simple log insert, or several thousand to install a high-quality built-in system including electrical.